Document every service request completely in VixxoLink Mobile — from time-in through Review & Sign — so invoicing and payment move quickly without rejection. This guide covers timing in/out, on-site documentation, and closing out a service request.
*Complete all steps before leaving the site. Missing photos, resolution notes, or signatures commonly delay invoice approval.
*If you are stuck and need assistance, please call 866-988-5376 — Option 1 for payment status, Option 2 for invoice/quote help, Option 3 for VixxoLink technical support, Option 4 for dispatch/service-request questions — or click the Submit a Ticket button at the top right.
See Service Request Documentation Requirements for full documentation standards.
1. Find the Service Request and Time In
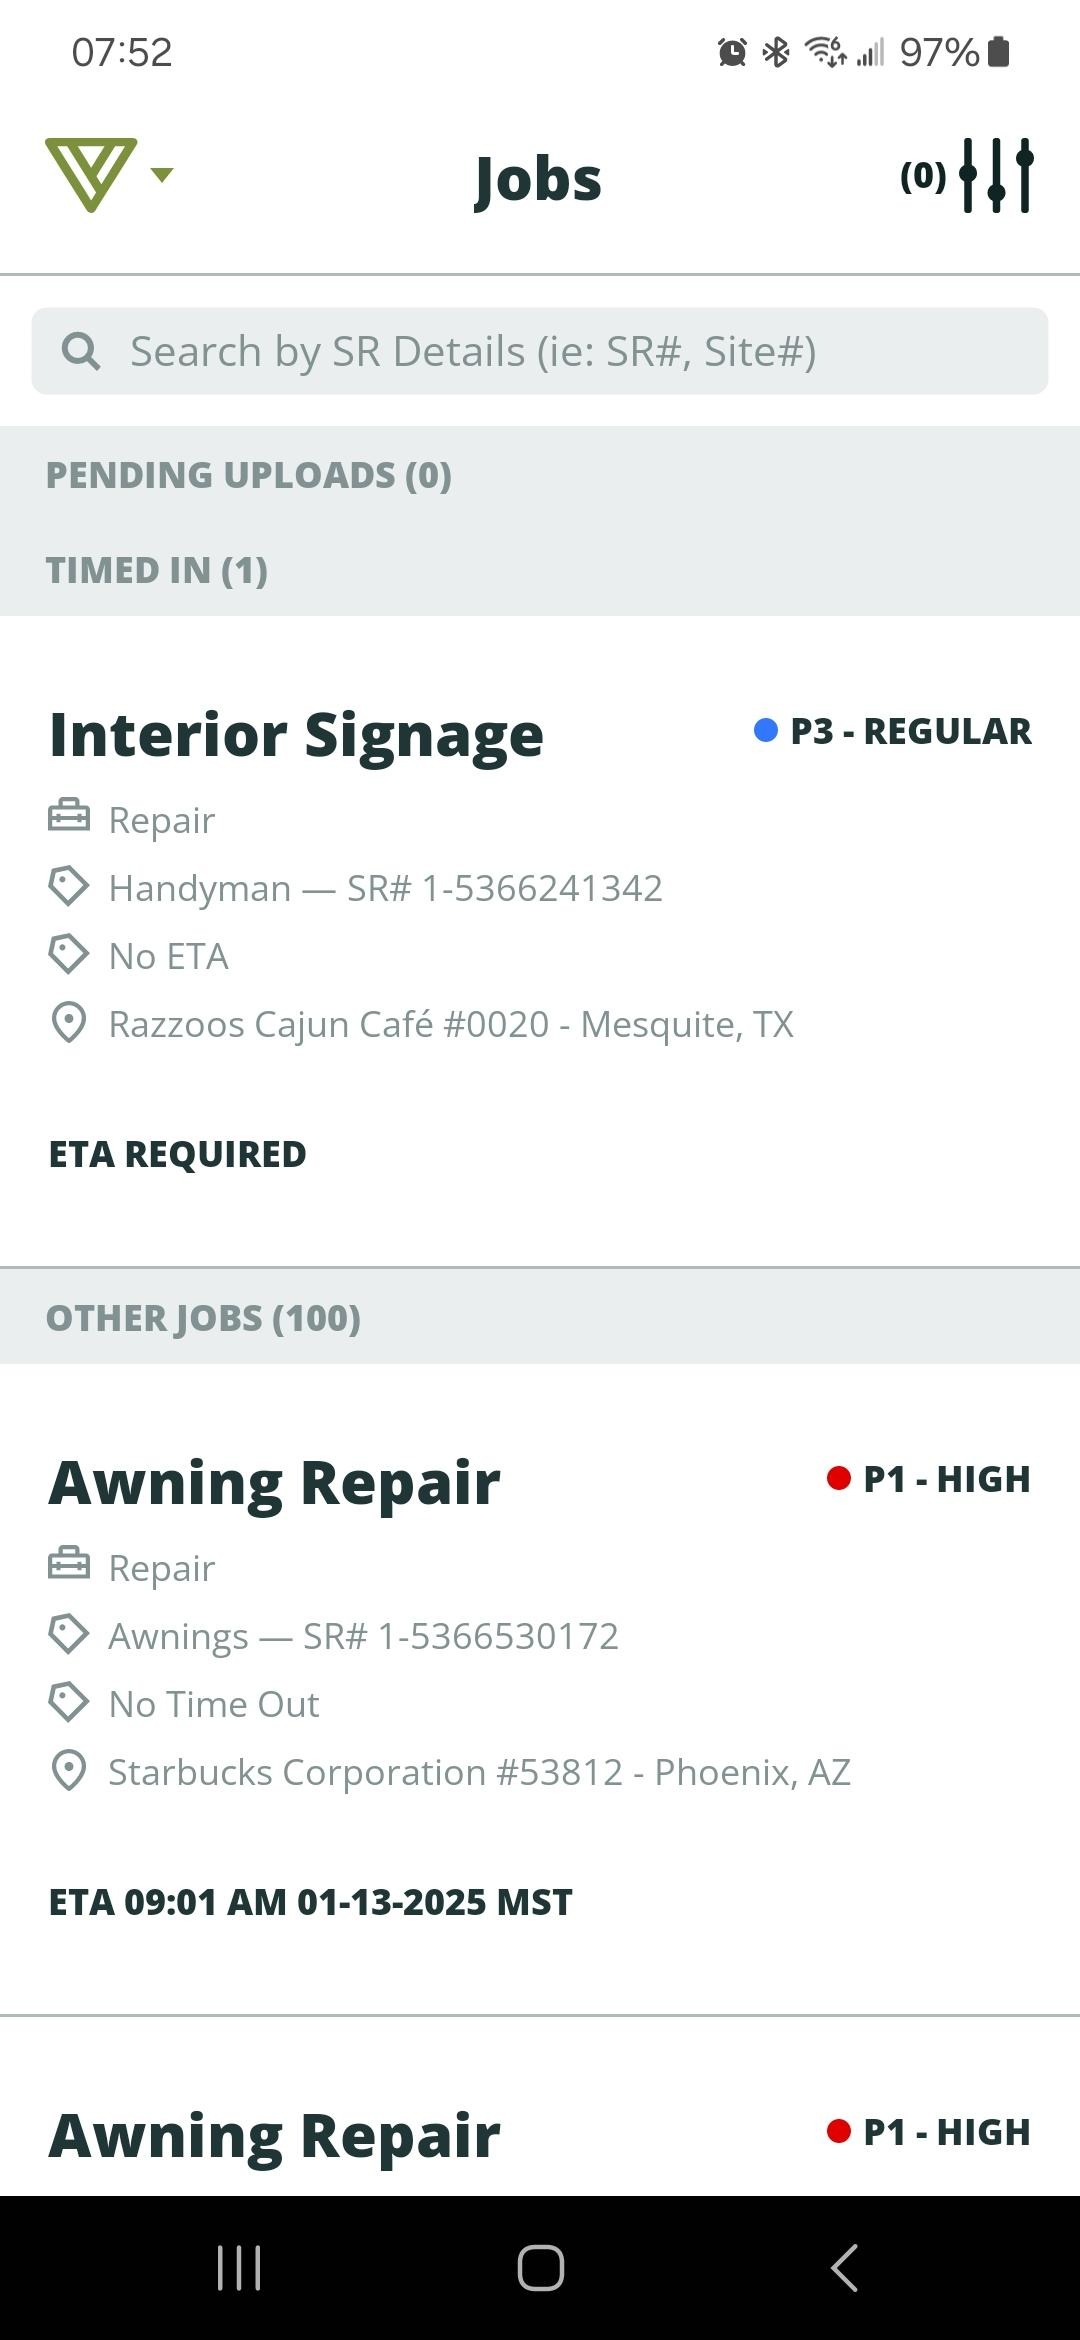
- After opening the VixxoLink app, locate the service request by scrolling, using the search bar, or applying filters at the top right.
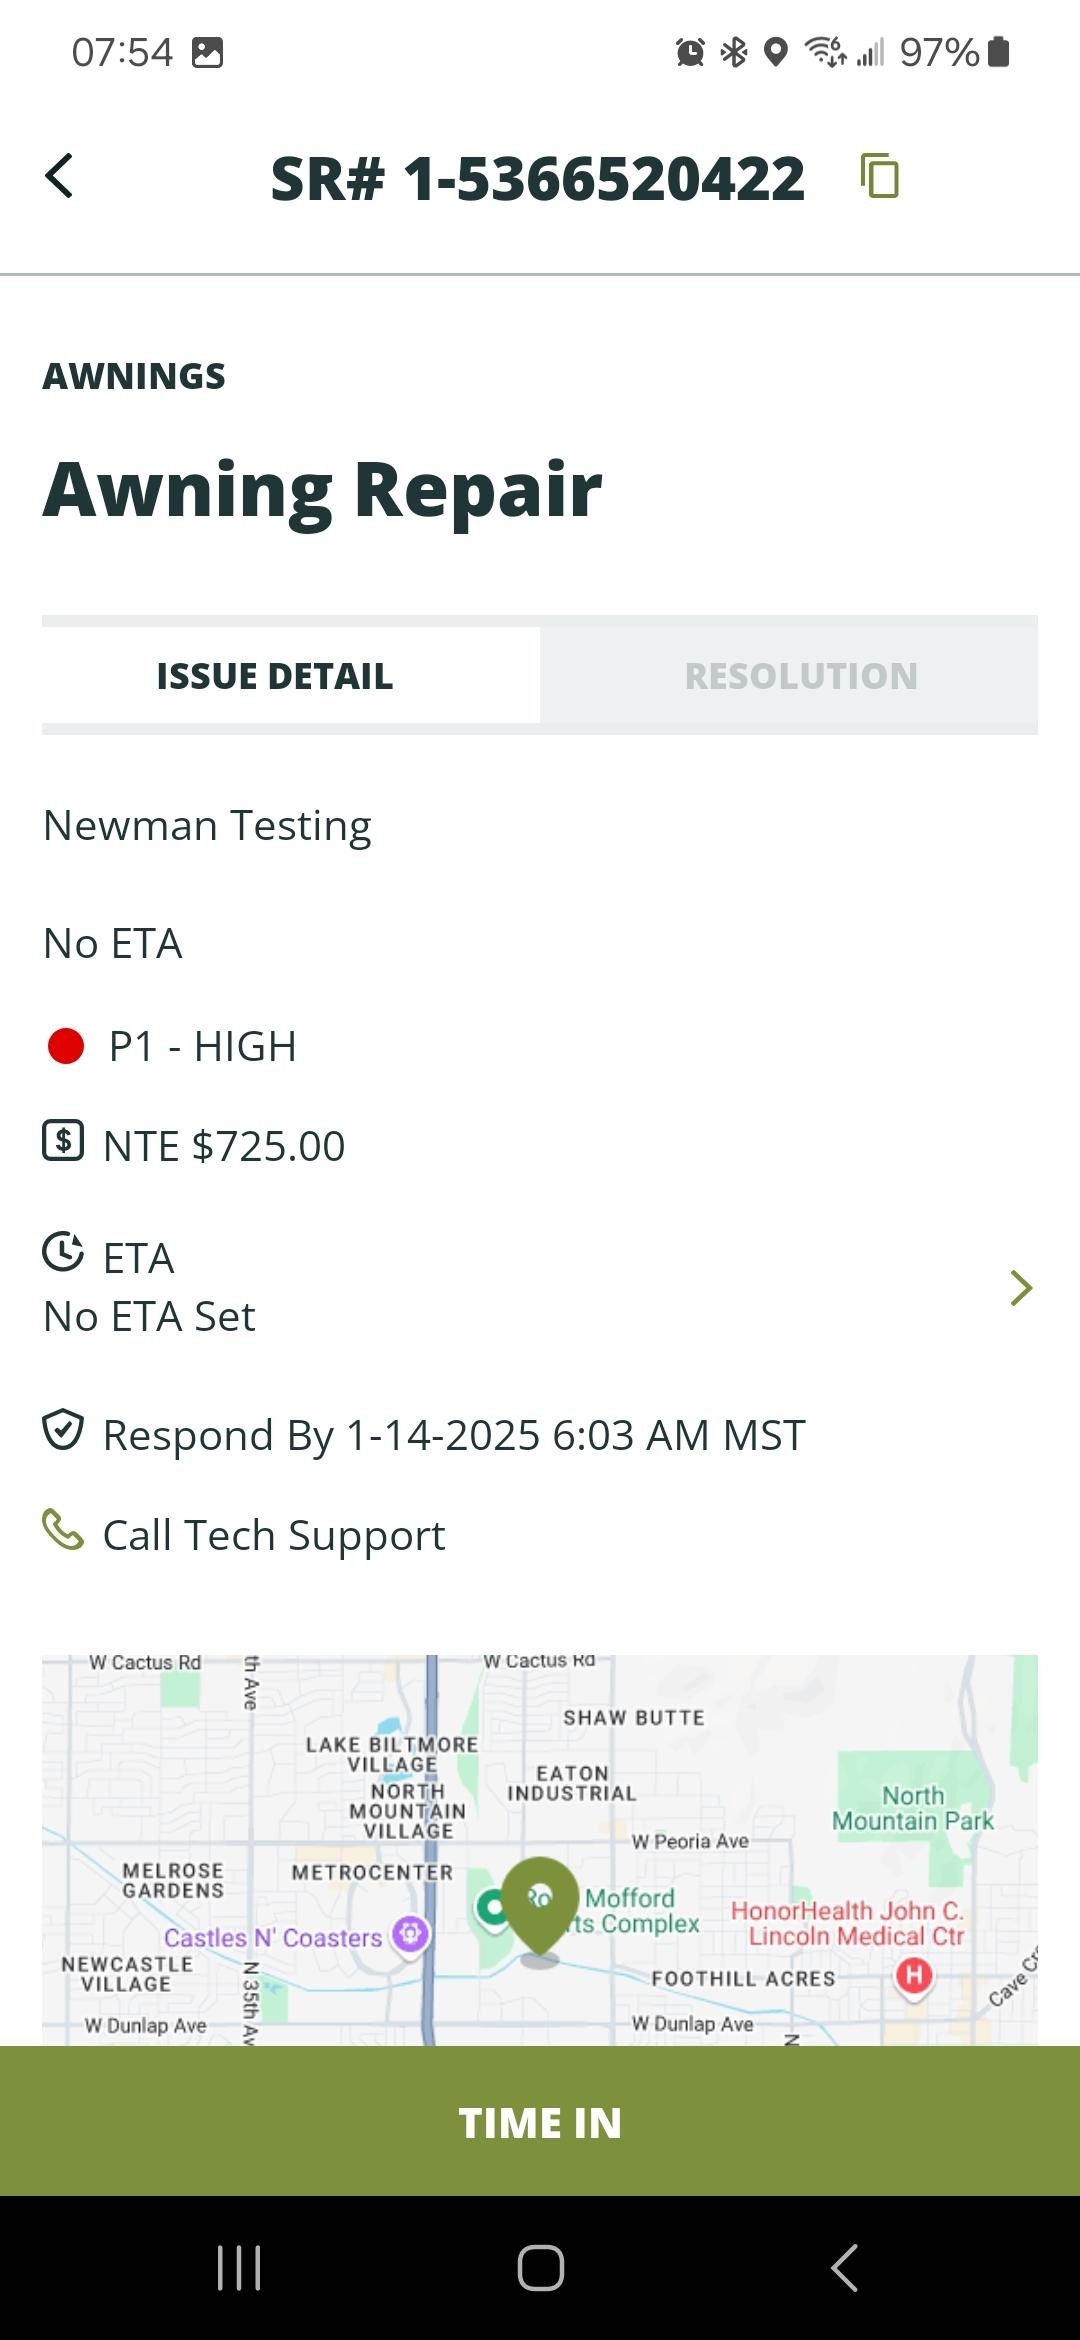
- Review the service request details to confirm you selected the correct job, then tap Time In. *You can only time in once you have arrived on site — VixxoLink uses geofencing.
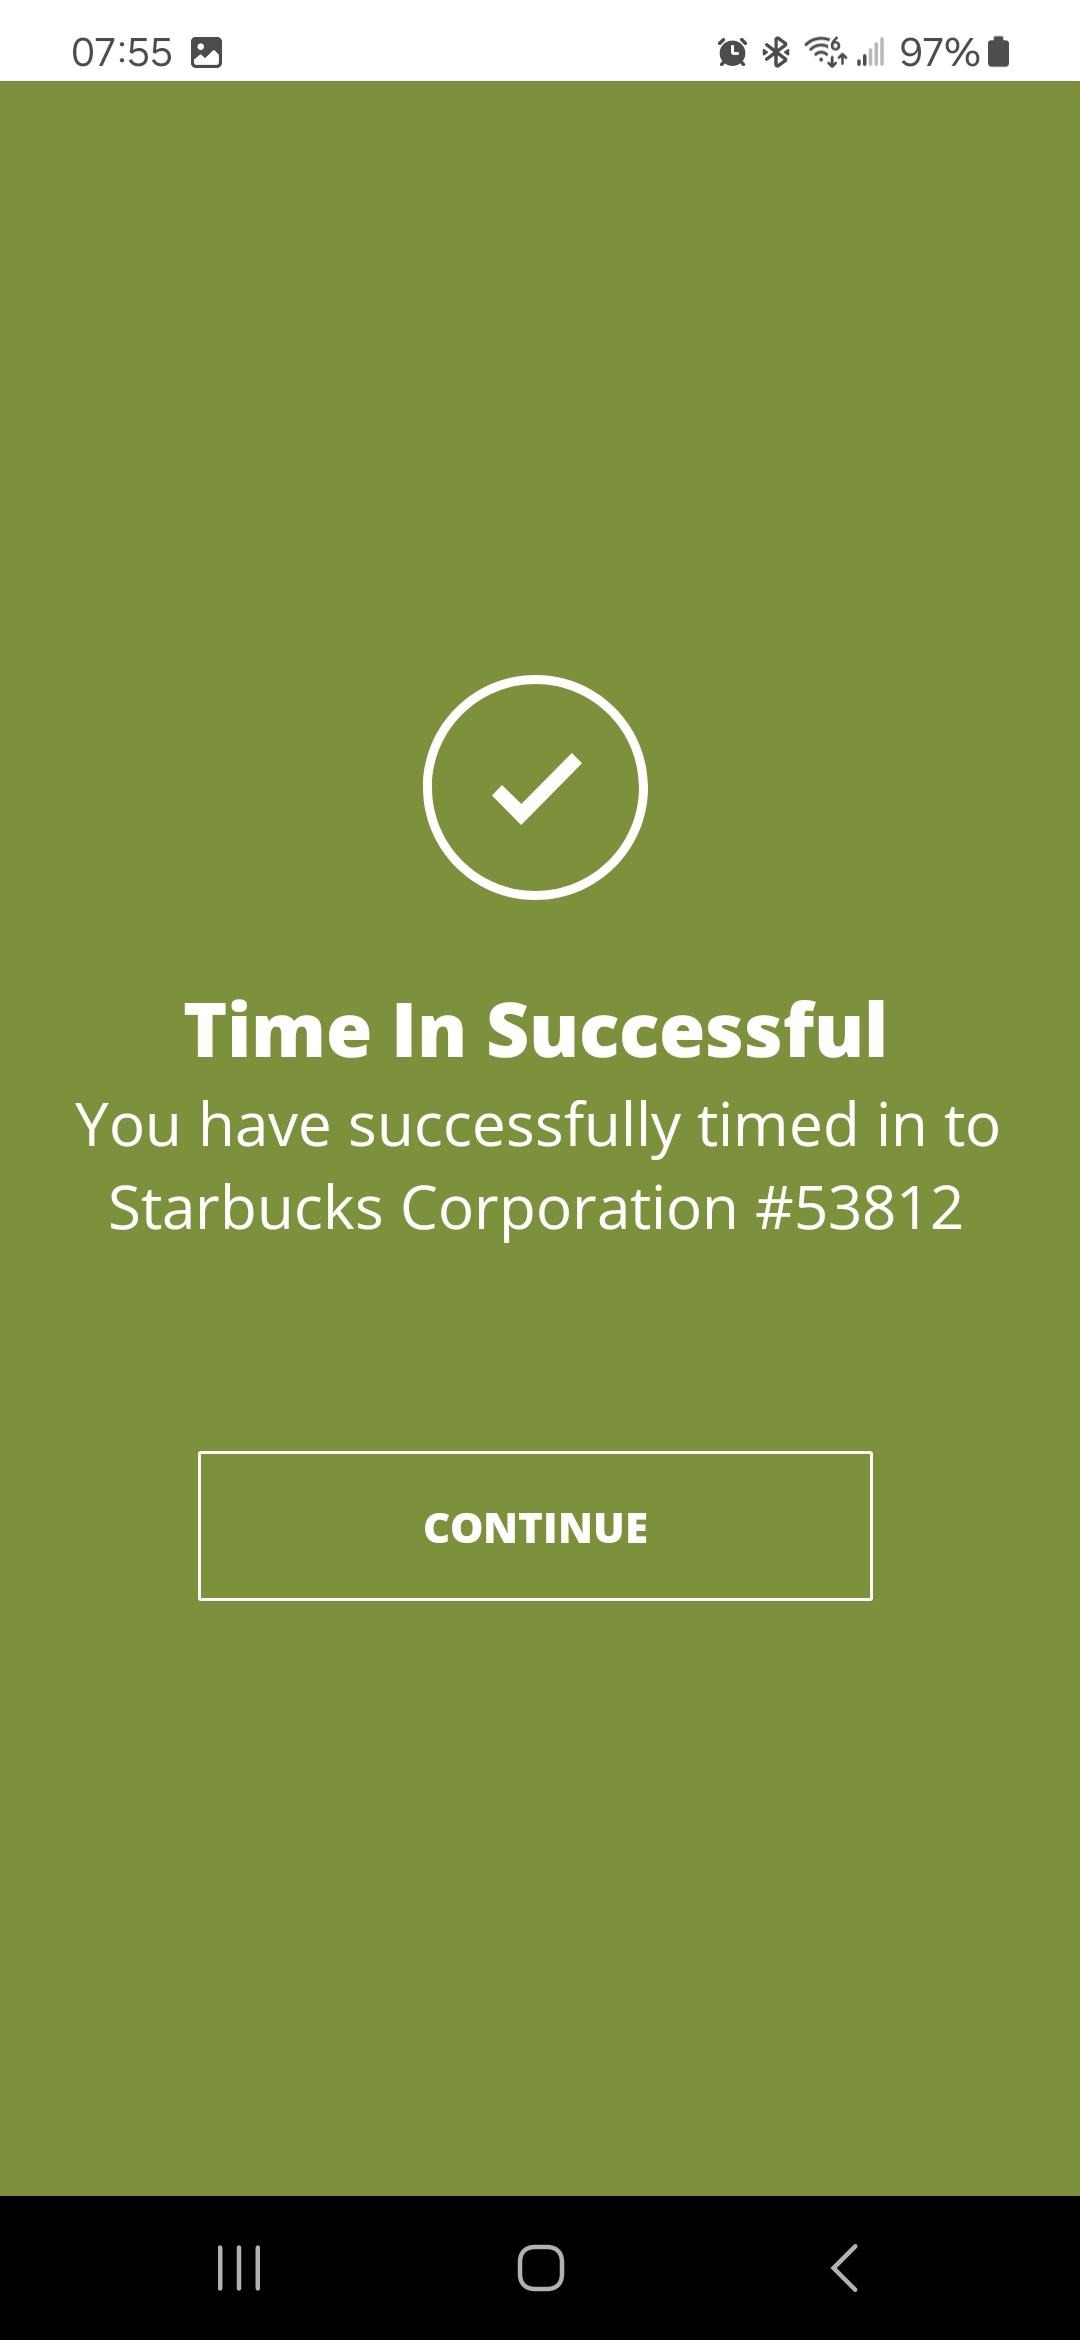
- When the app shows Time In Successful, tap Continue.
2. Document Work With Photos
Take "Before" pictures prior to starting work and "After" pictures once work is complete. Photos are required for invoice approval.
3. Assets, Actions, and Parts
- Once work is done, return to the app and tap Assets.
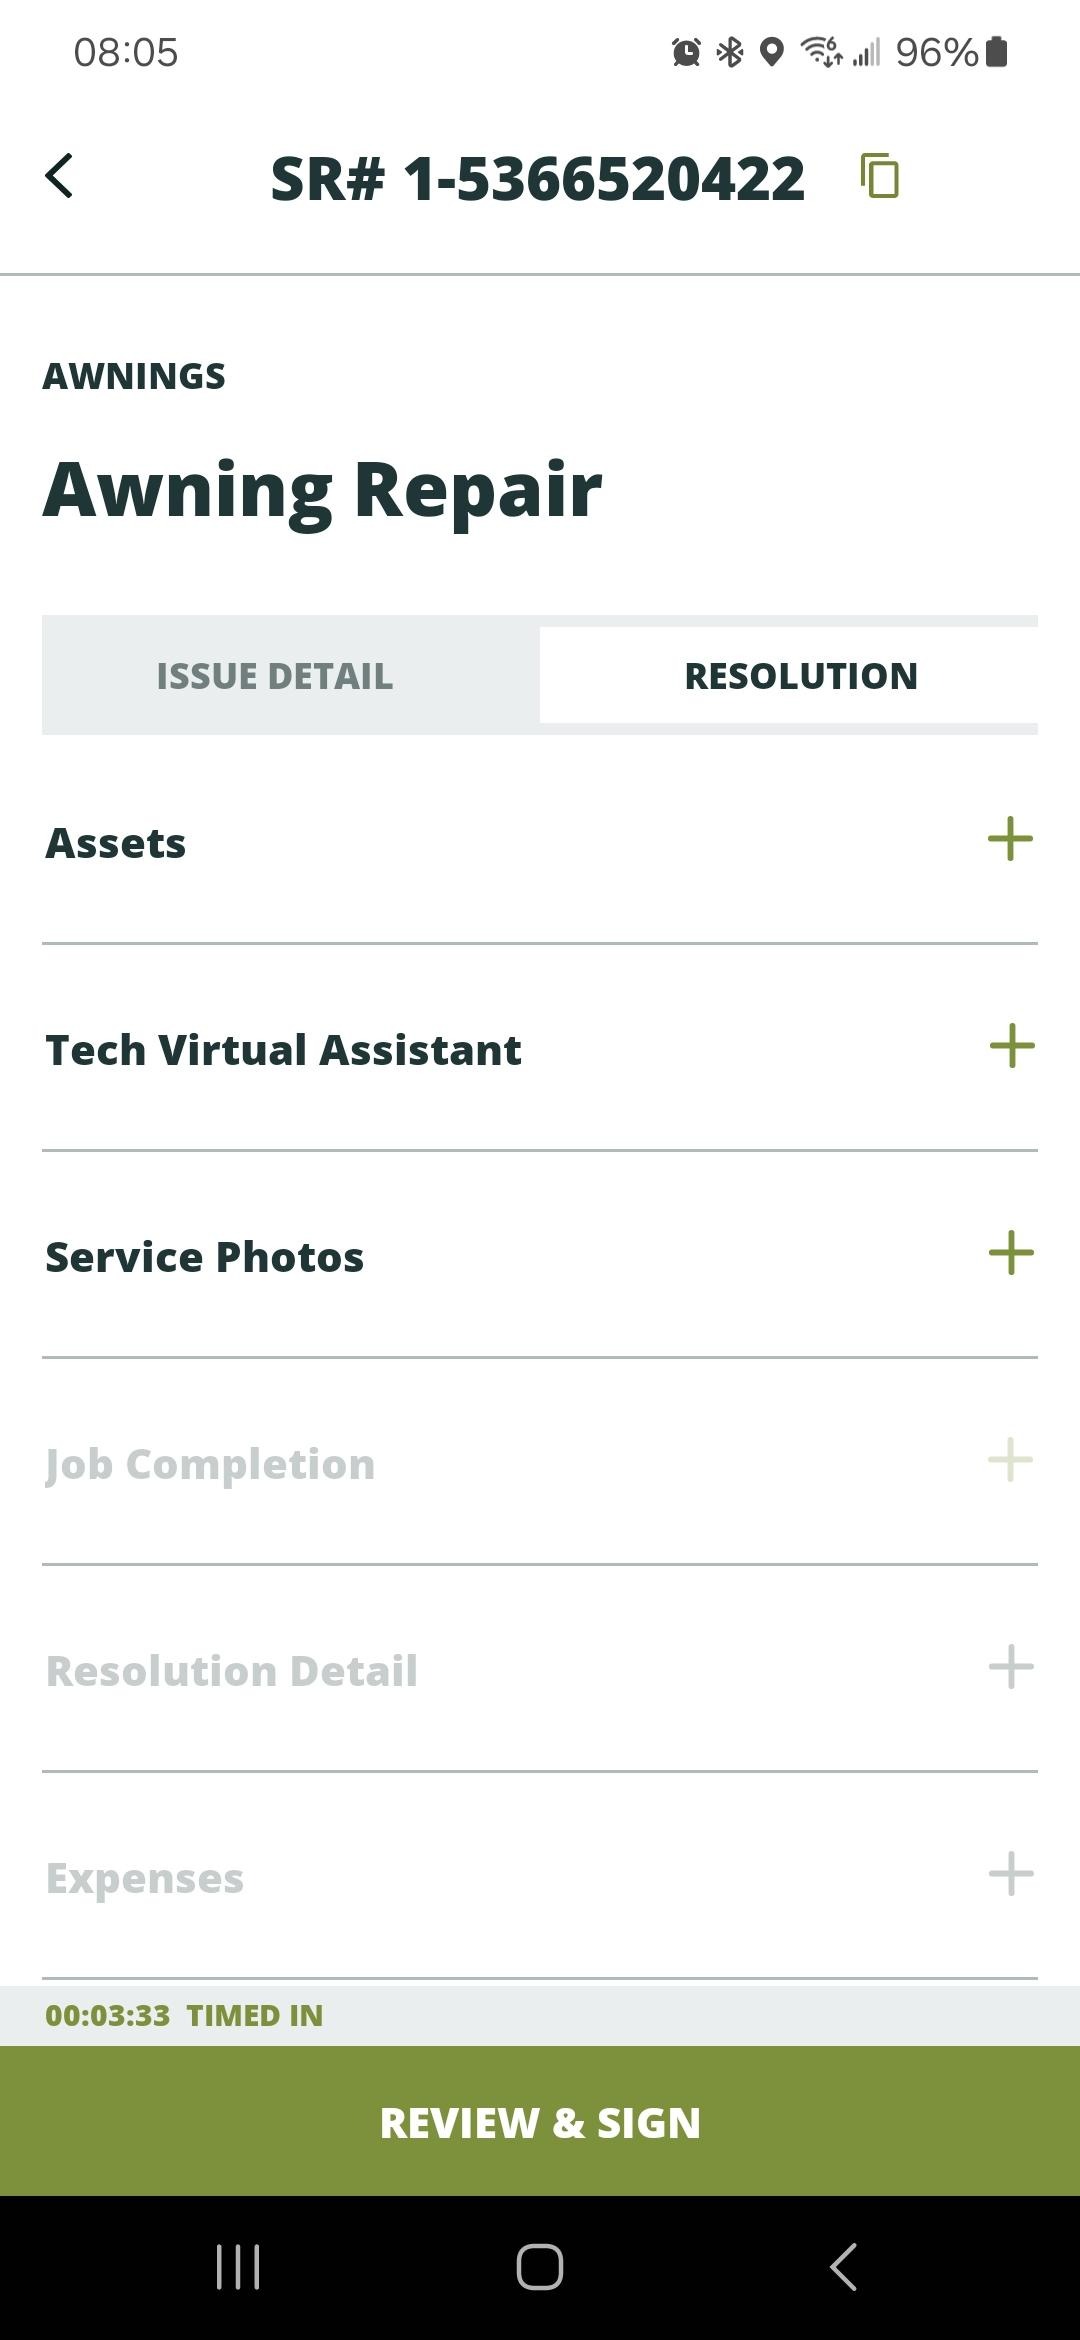
- Enter asset information: Scan Asset Tag if present, Search for the asset, Create an Asset if not listed, or tap No Asset and enter the work area.
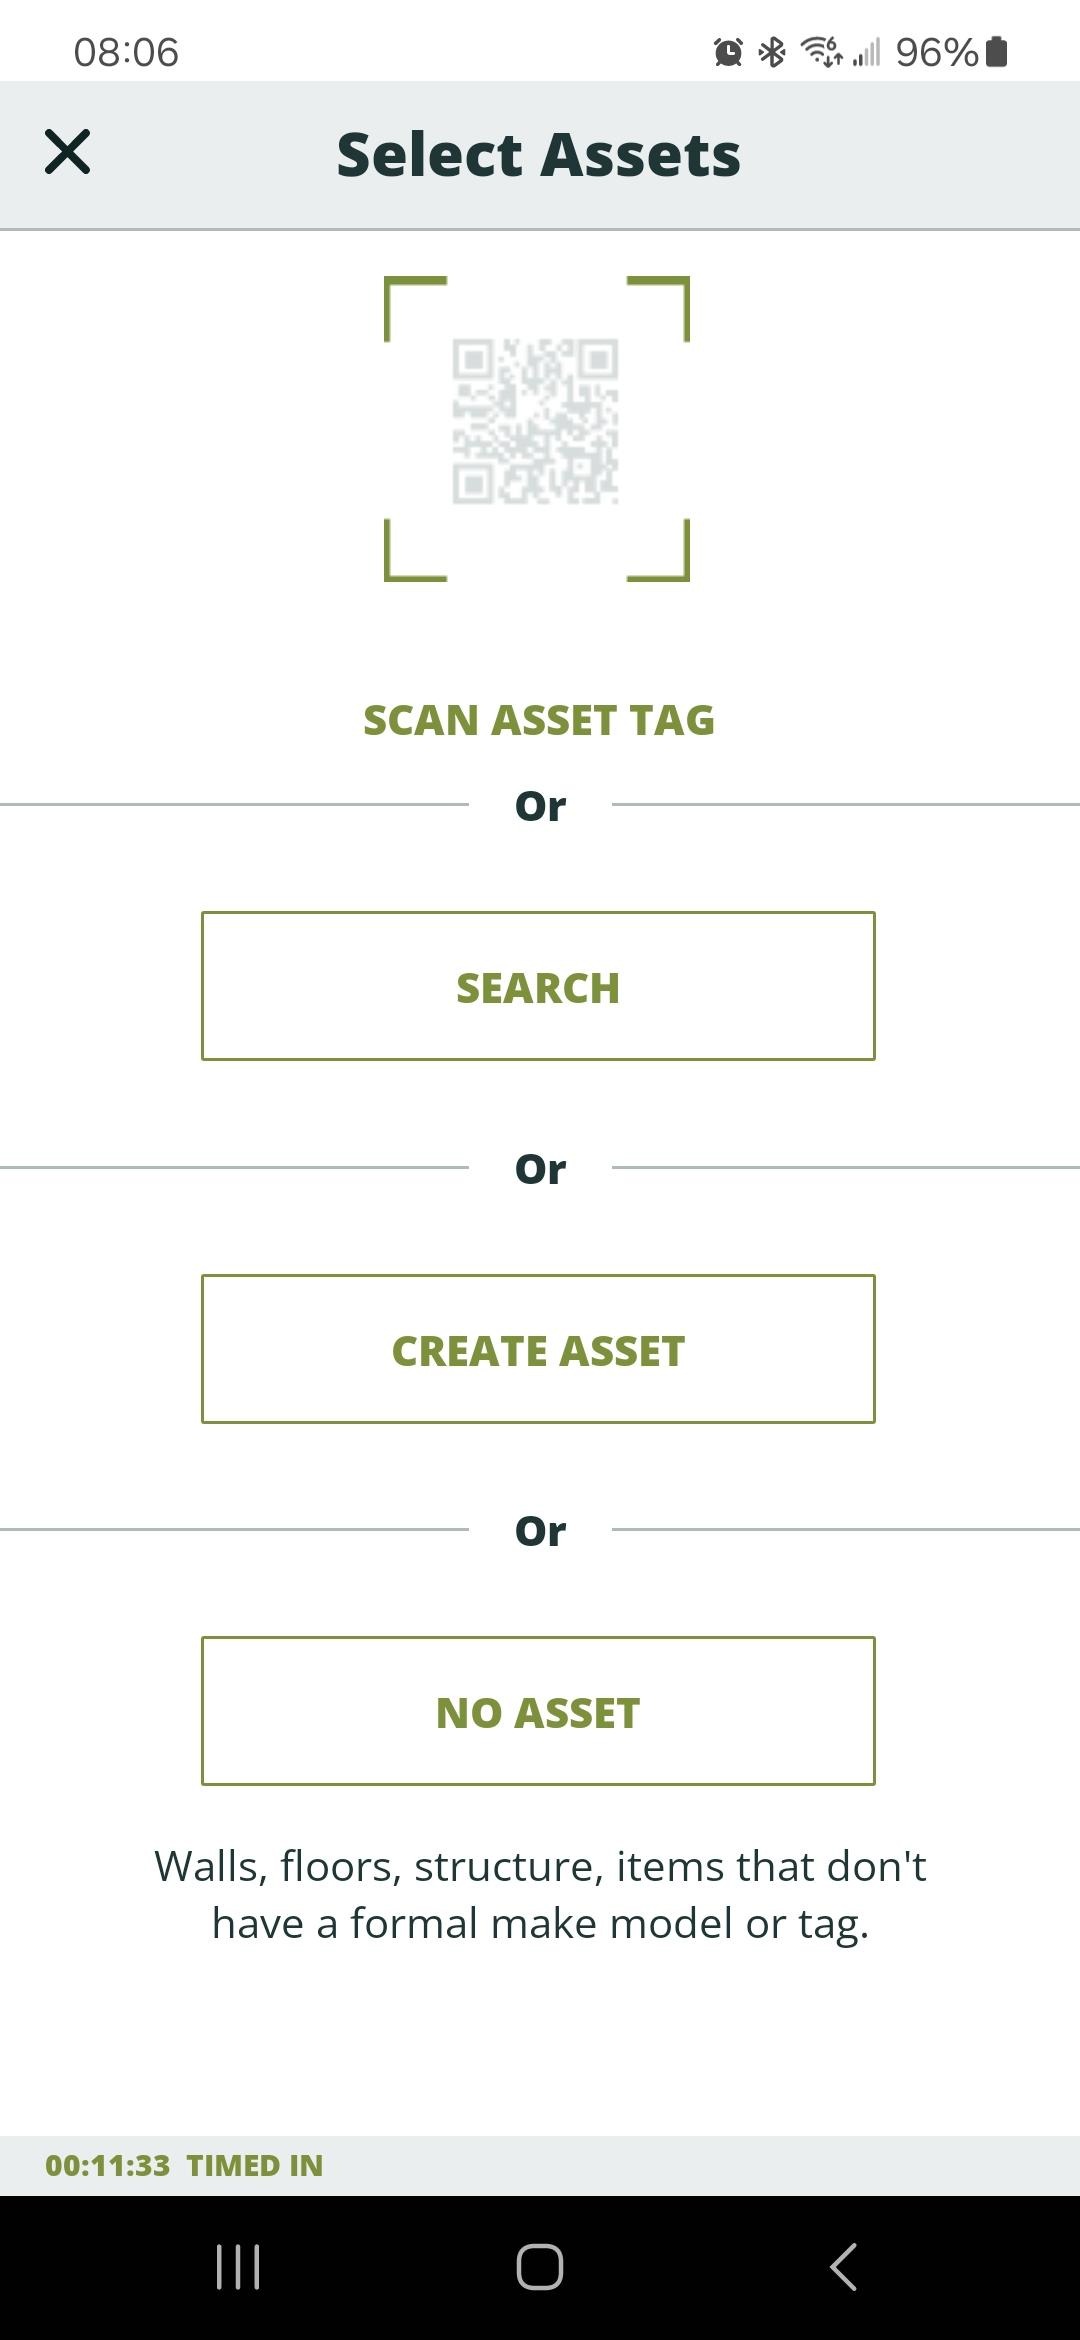
- Tap Actions and Parts, then Add Action.
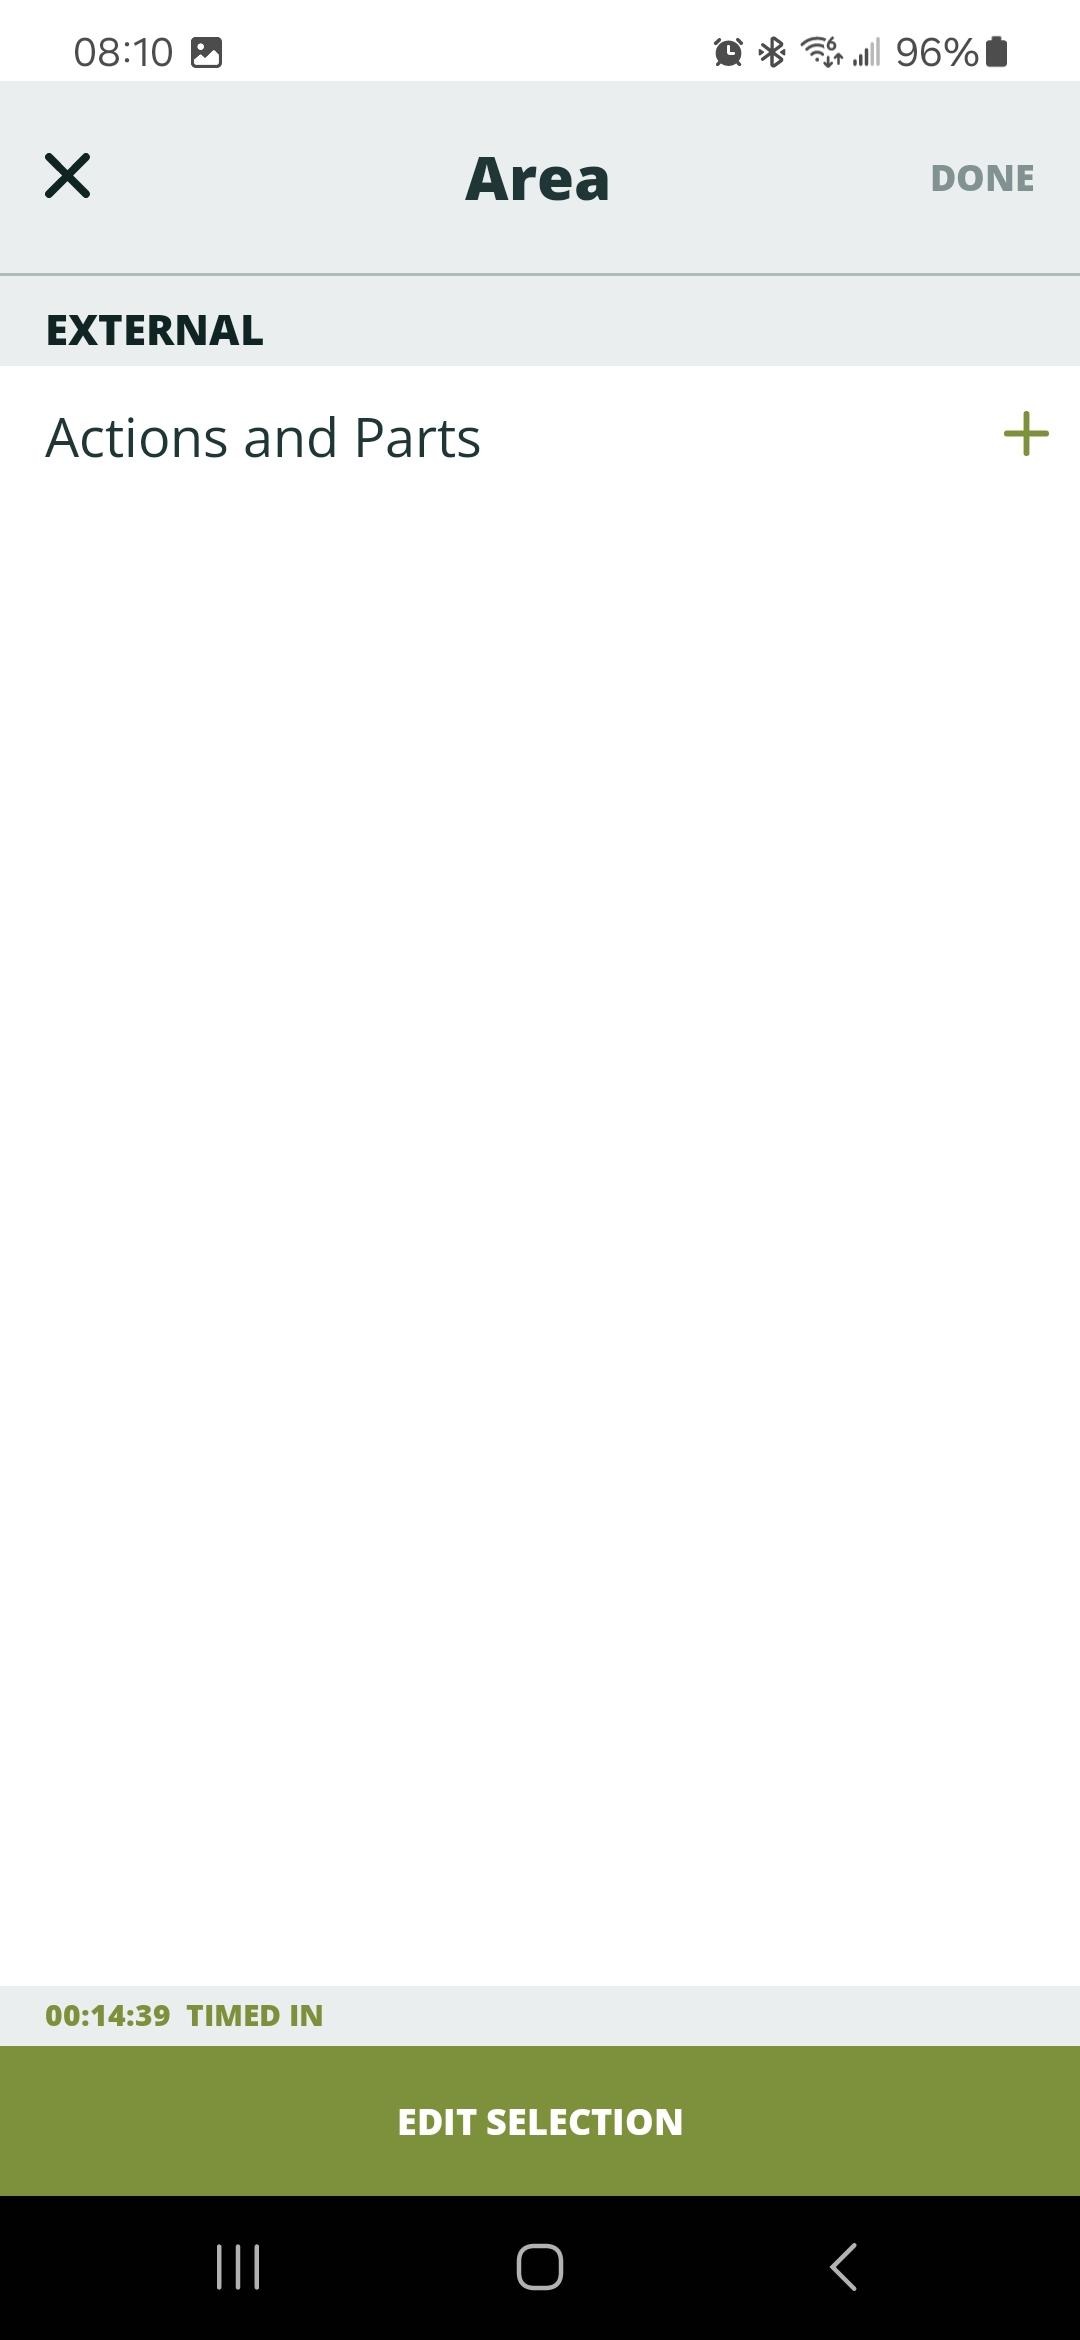
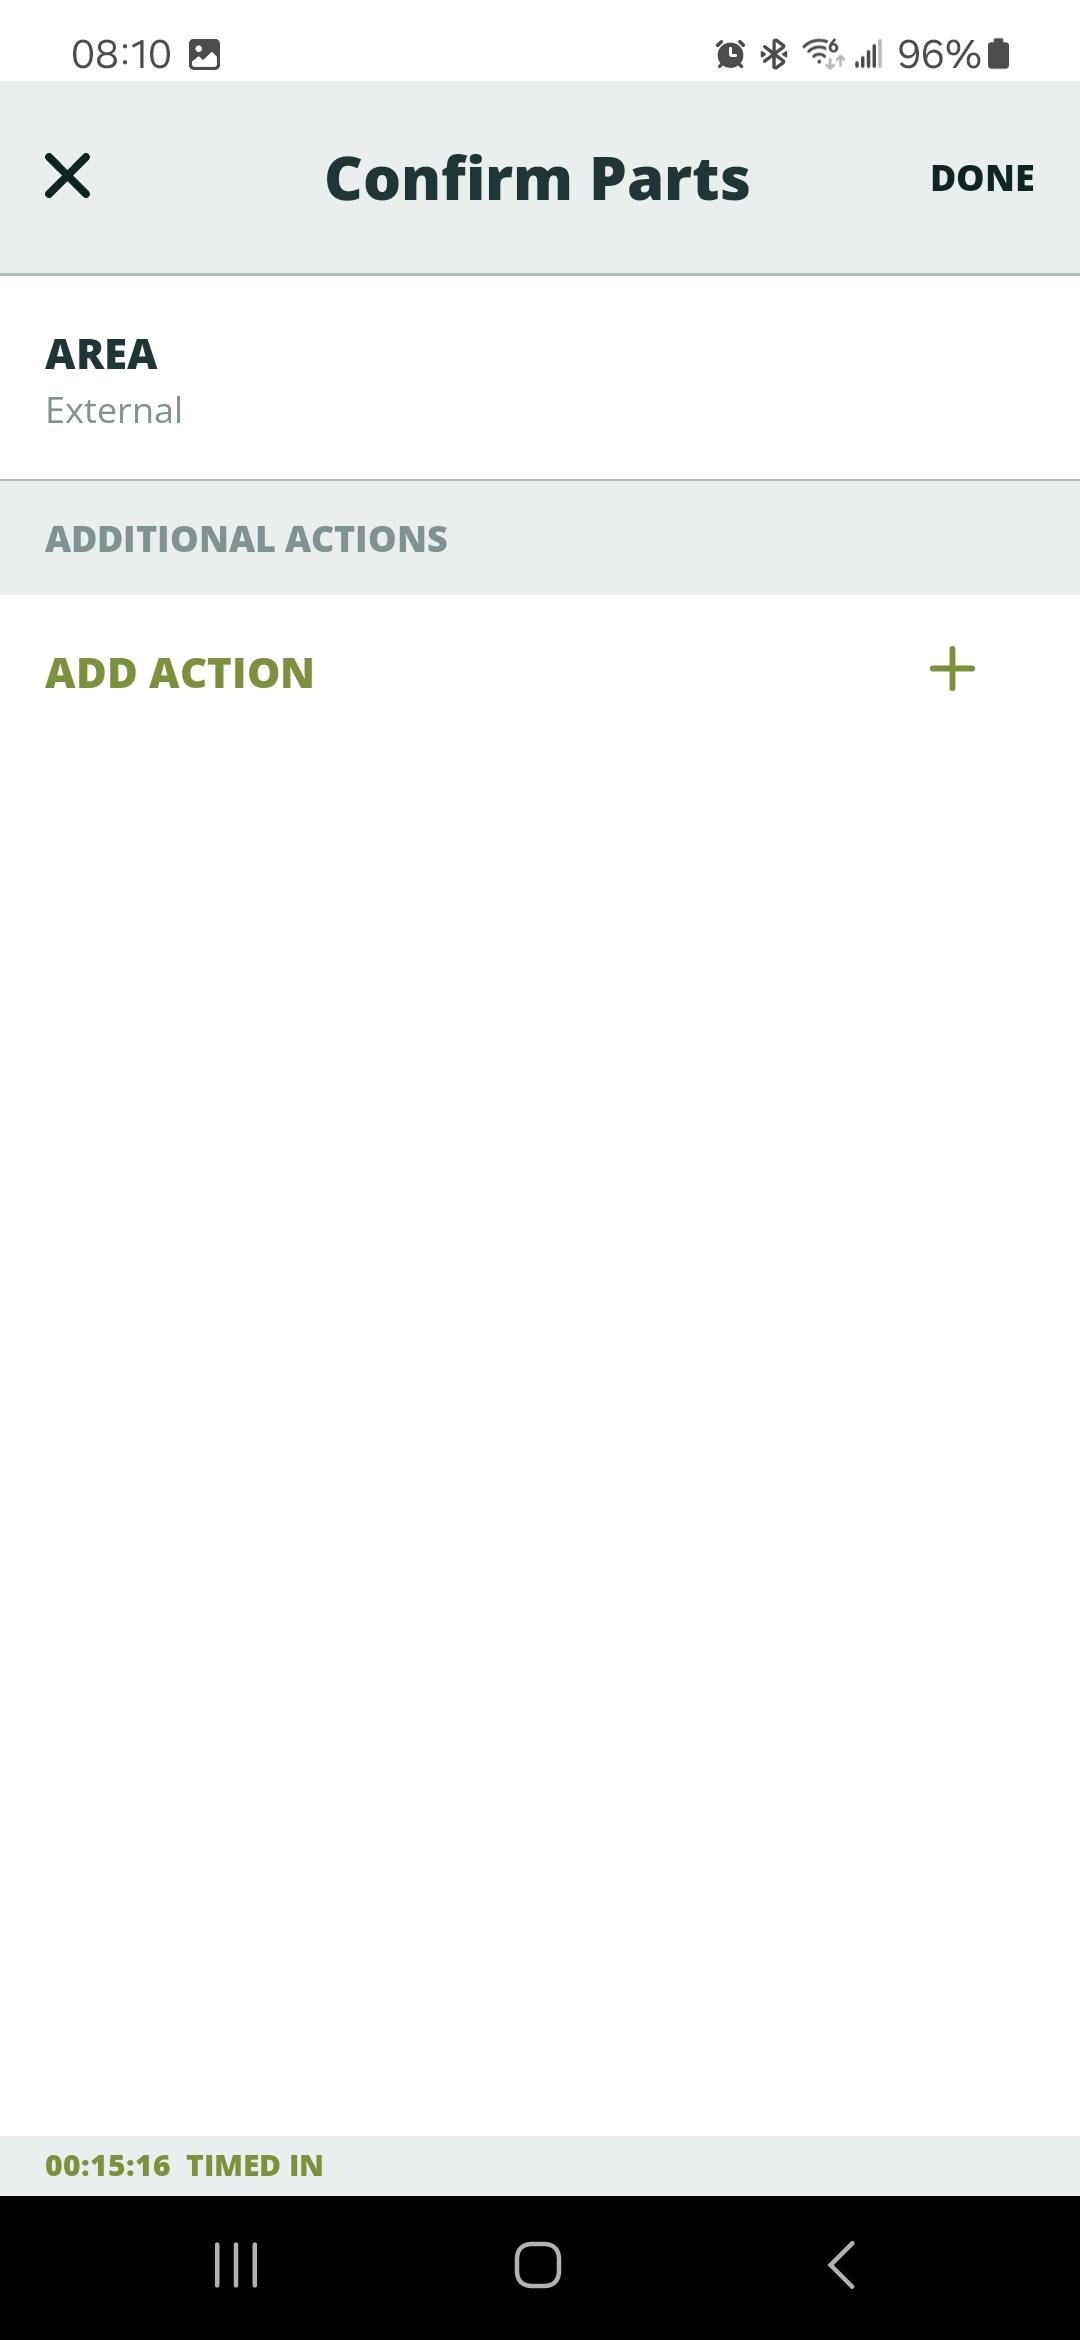
- Select the action you performed from the list.
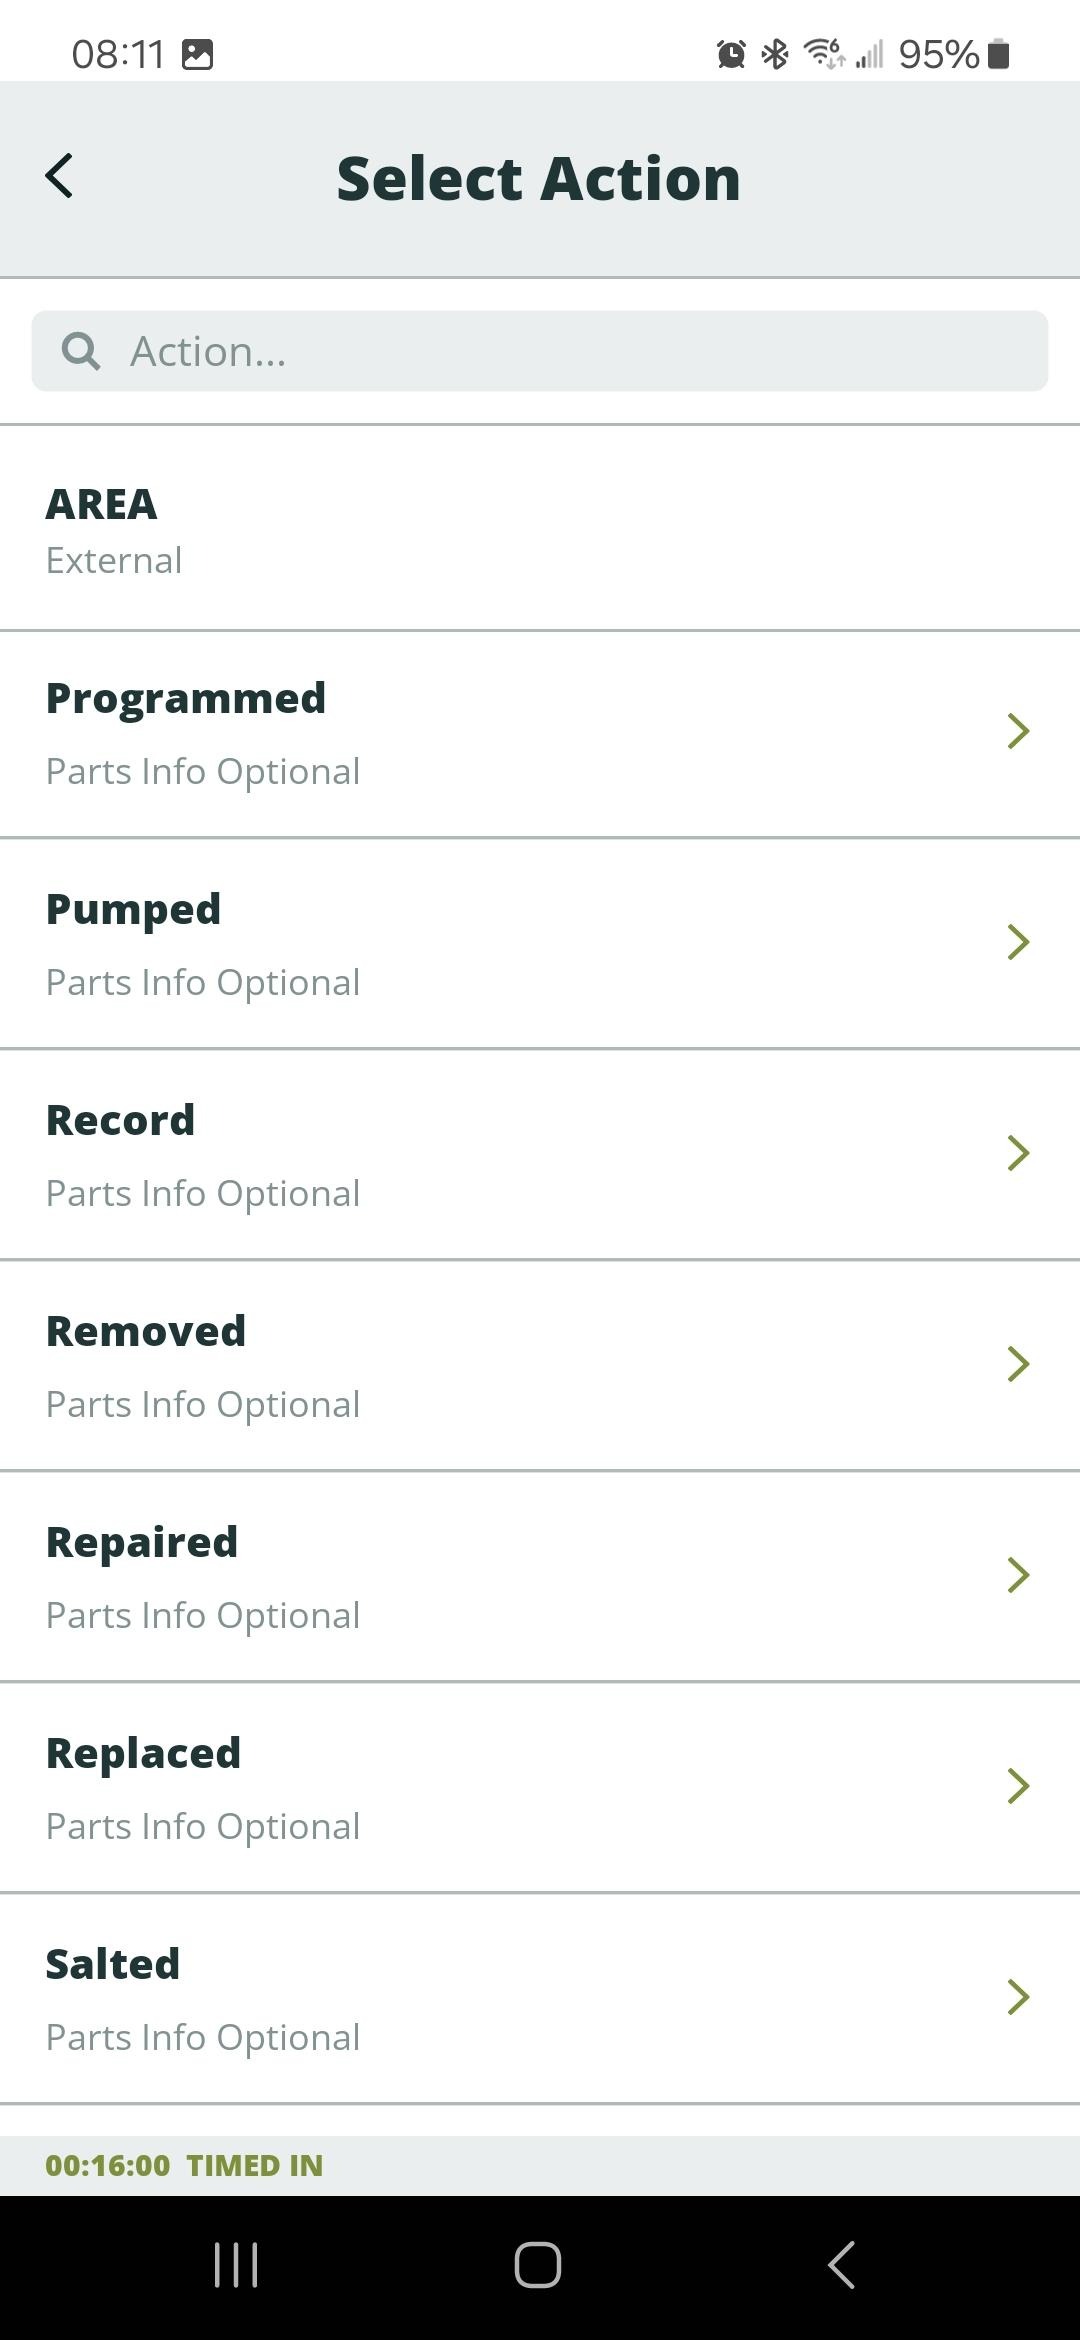
- Add any parts used. Tap Next if no parts were used, then confirm by tapping Yes.
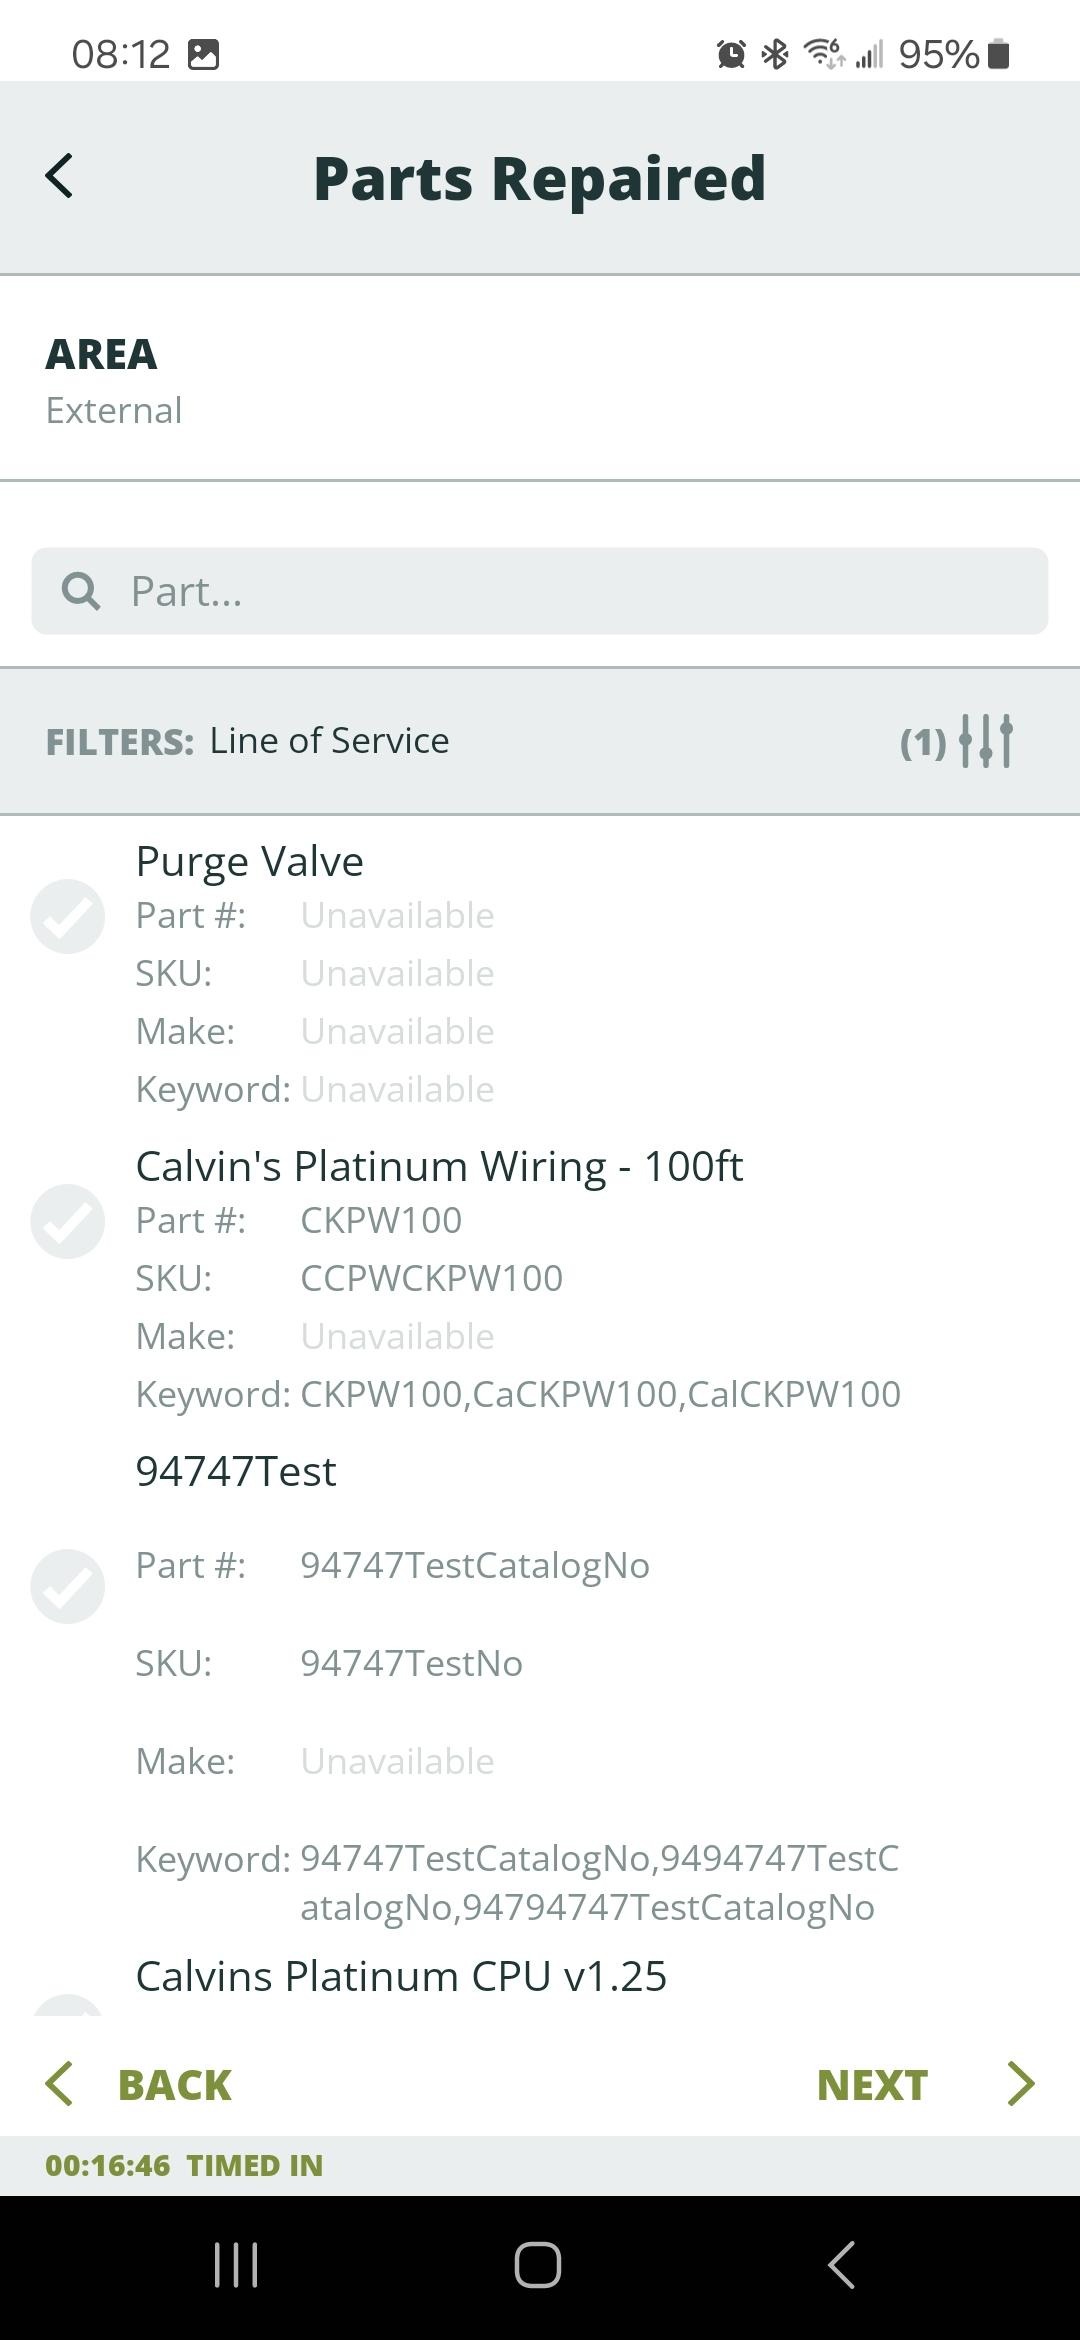
- Repeat for any additional actions and parts, then tap Done.
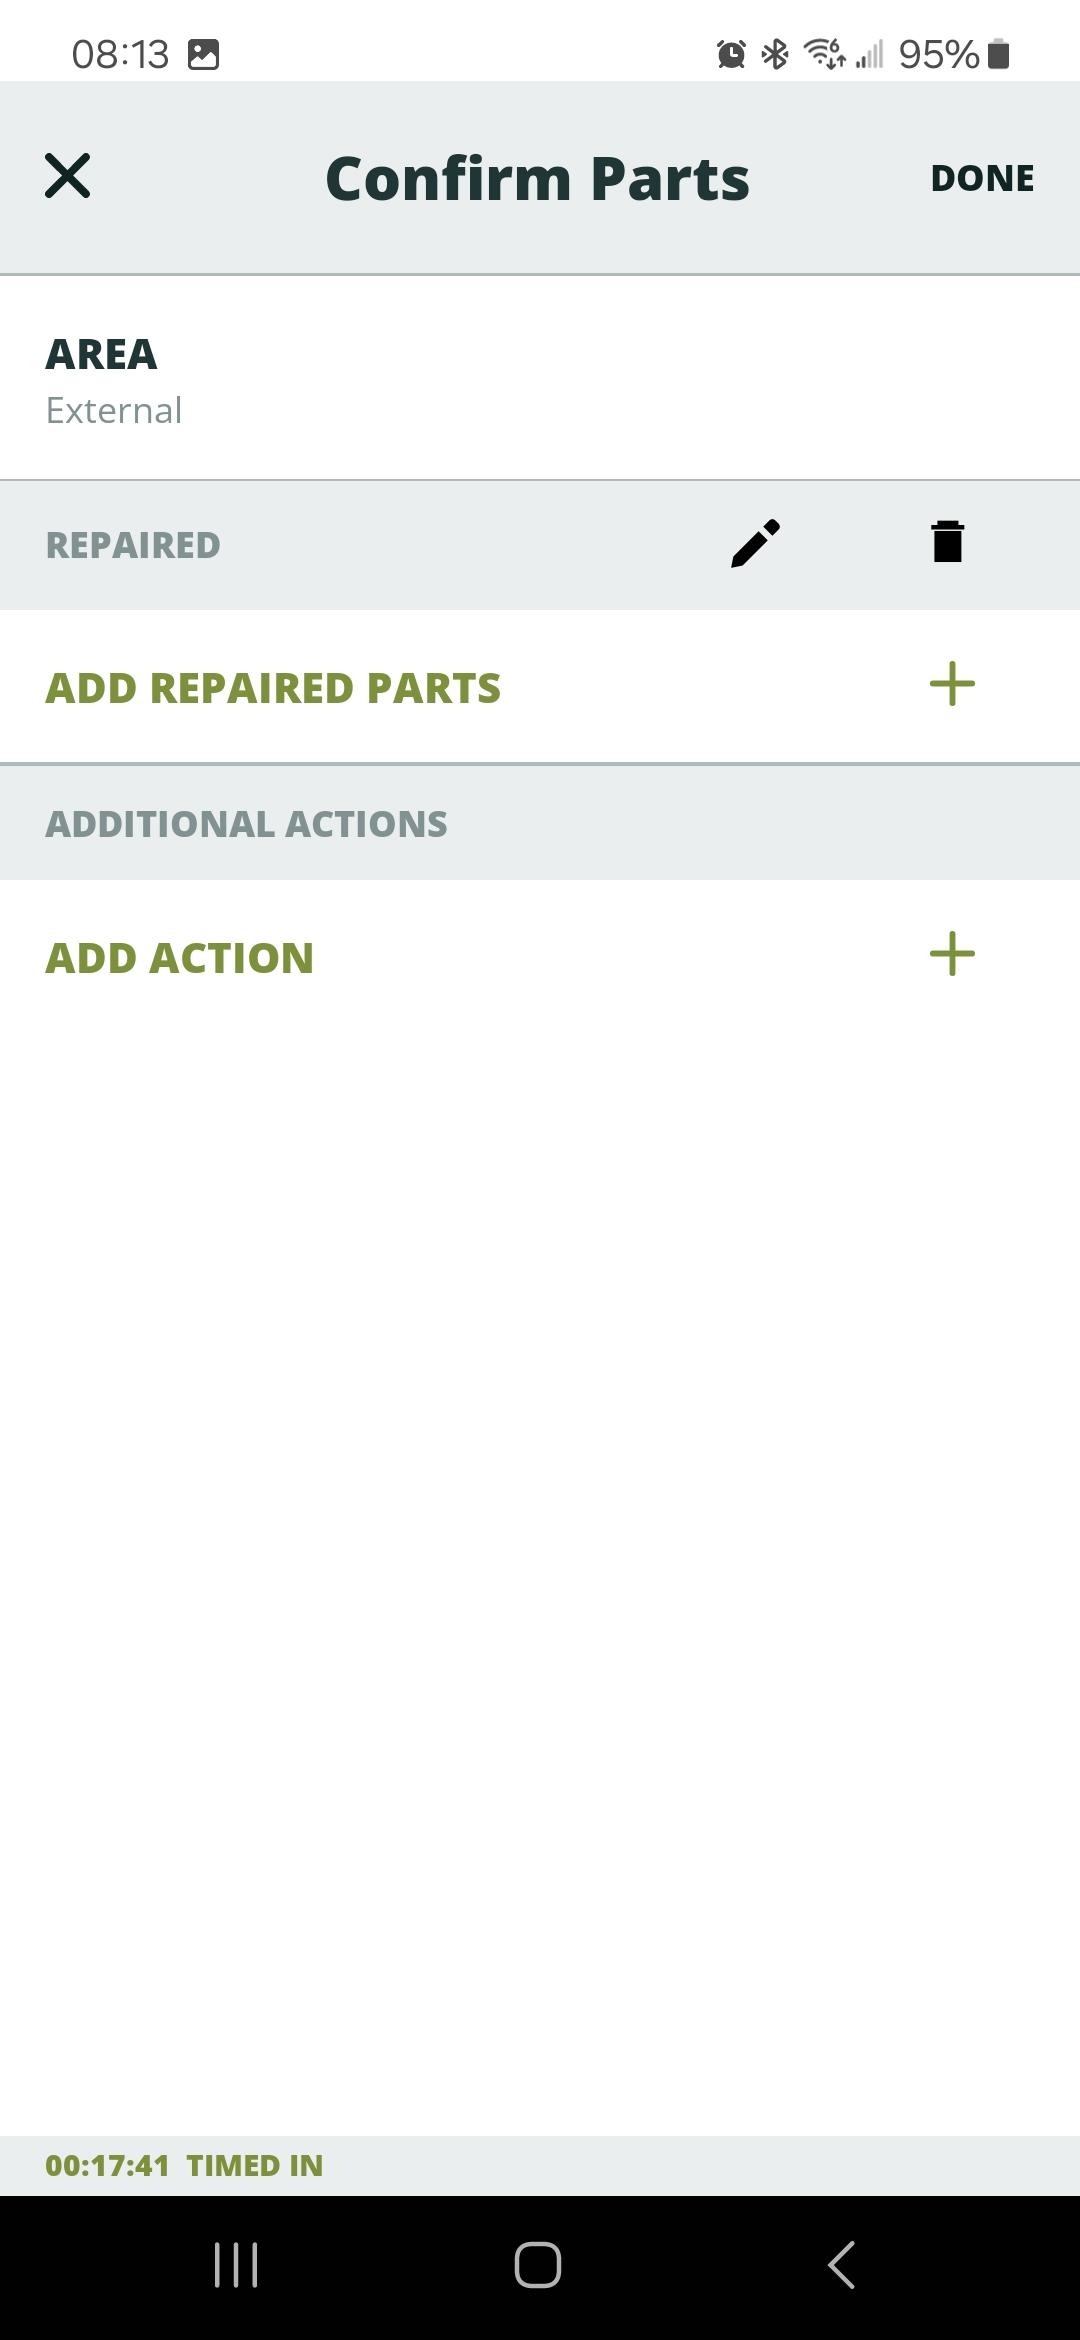
- Review the actions and parts added and tap Done.
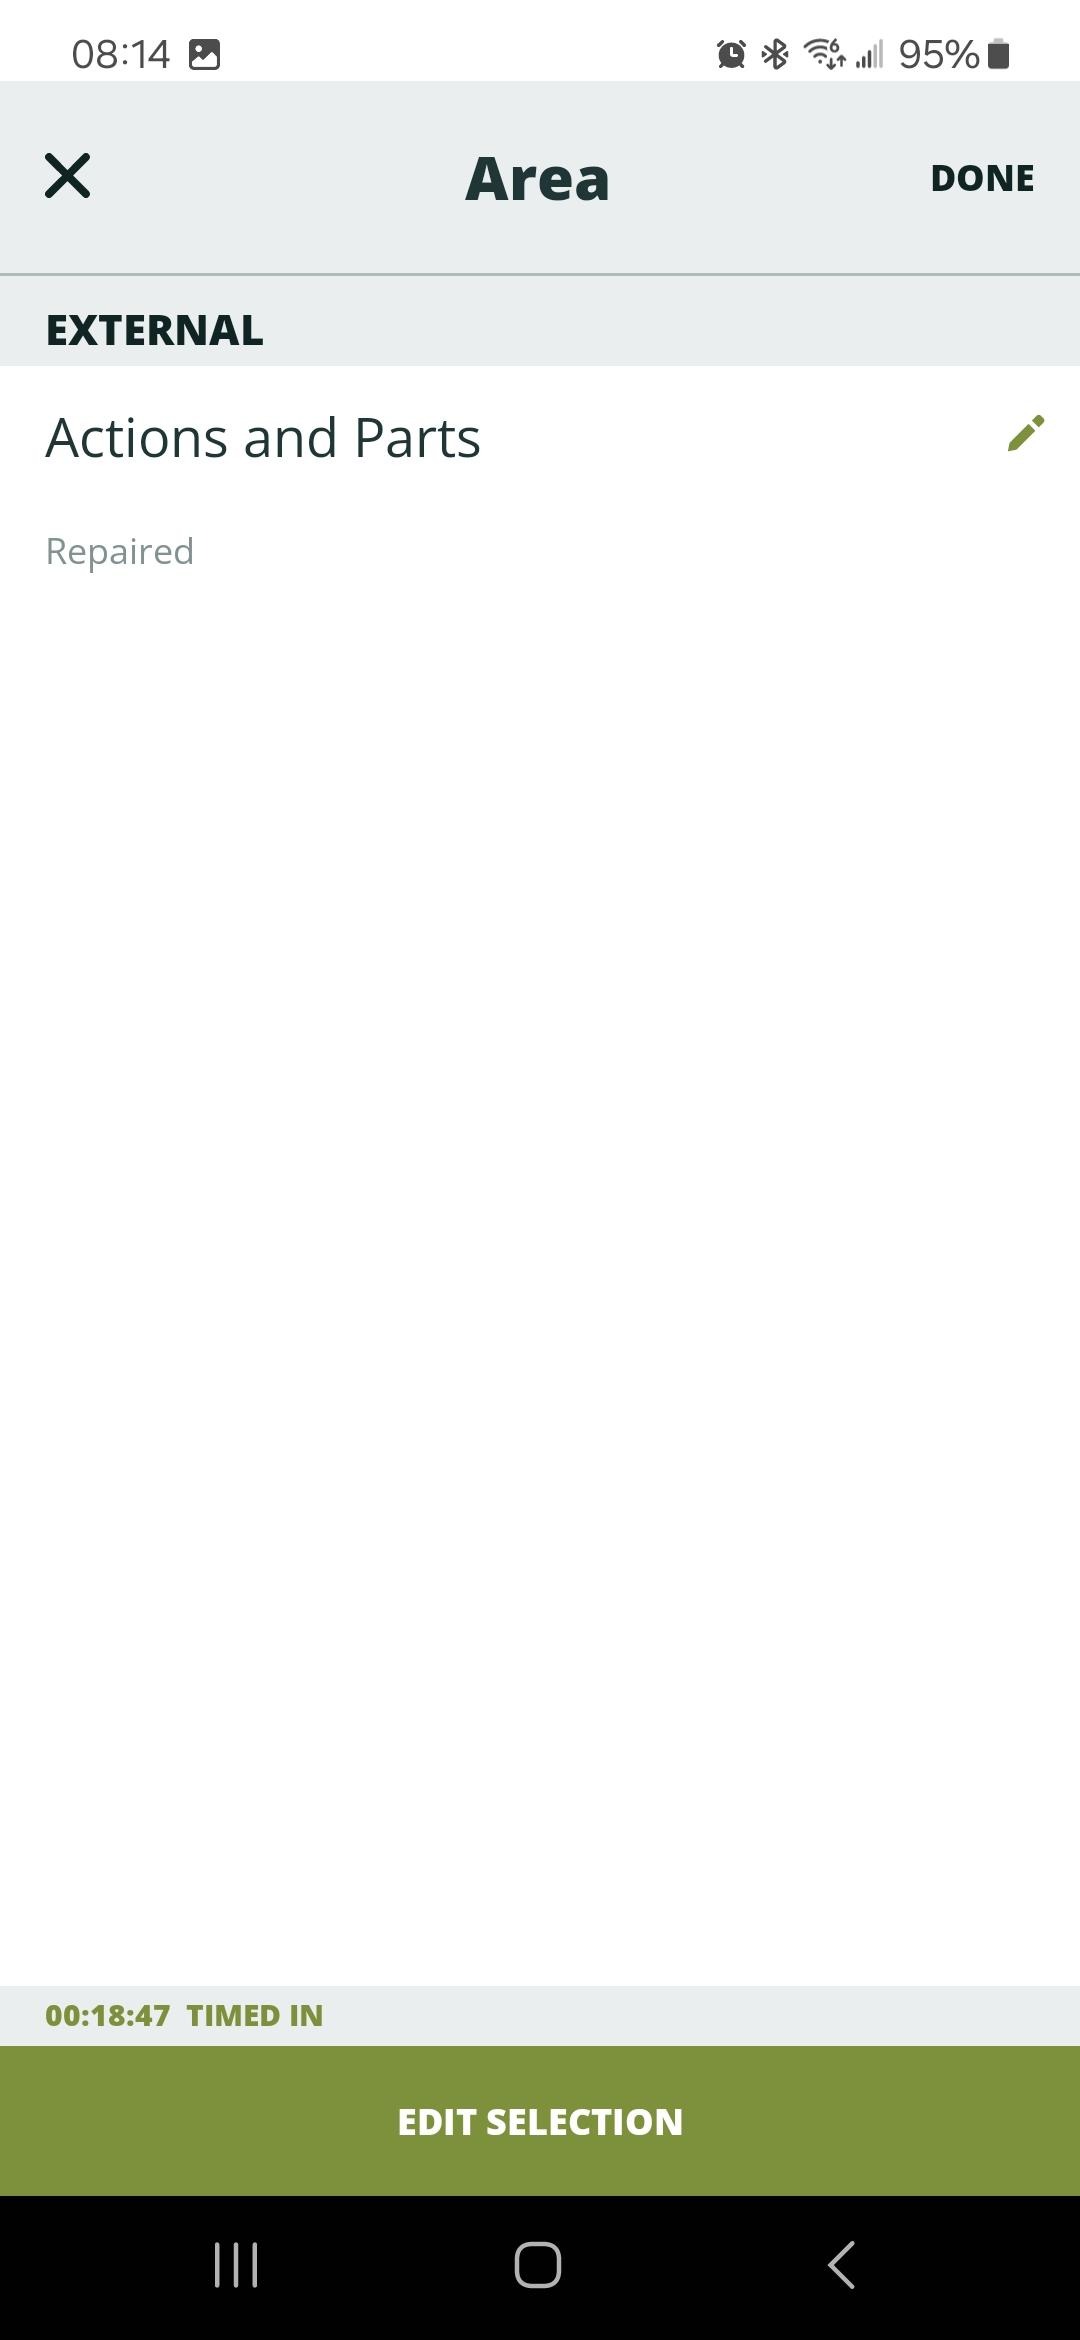
4. Service Photos, Job Completion, and Resolution
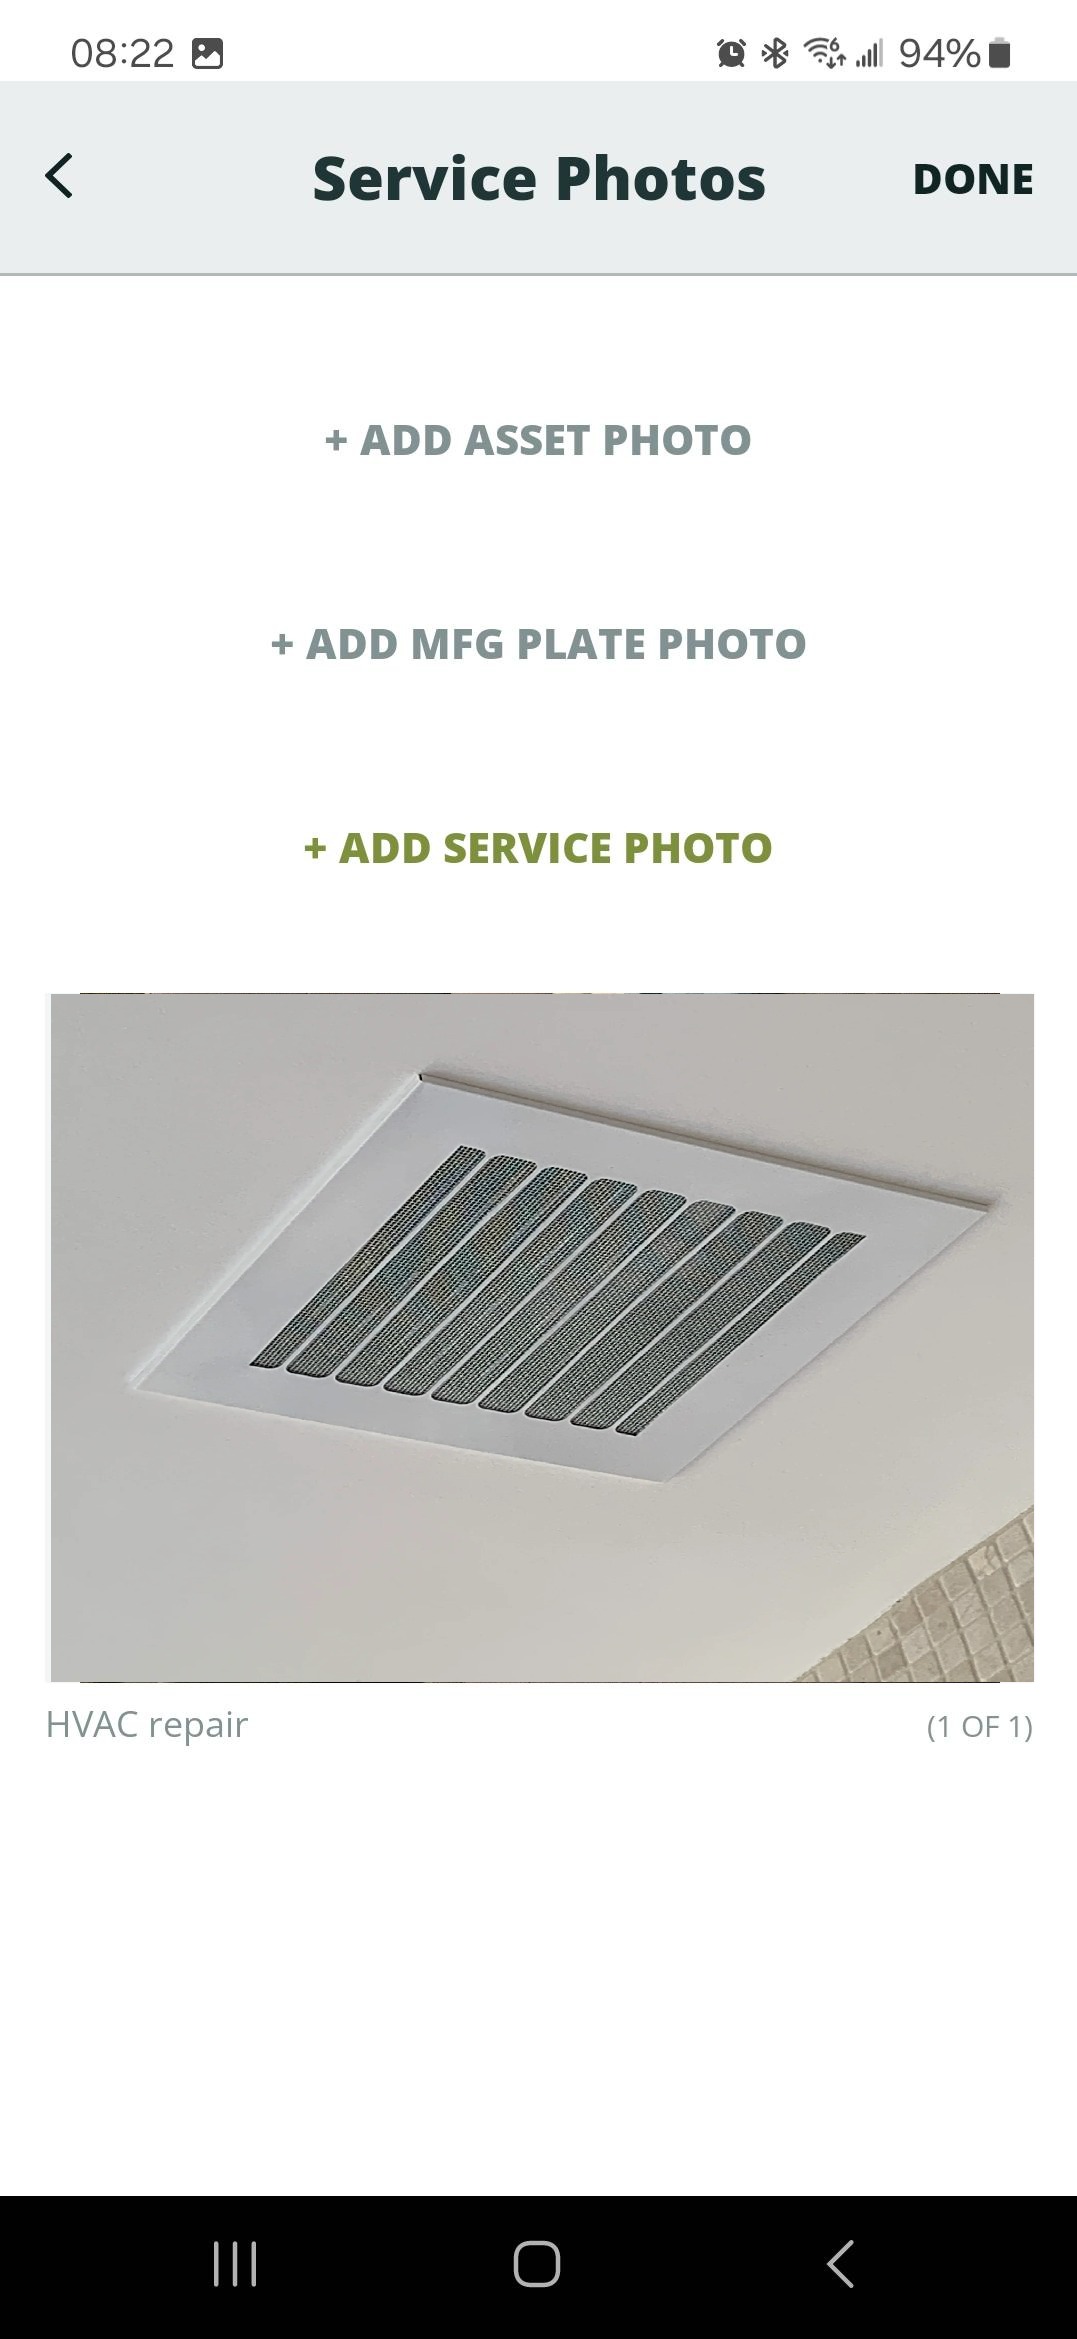
- Tap Service Photos, then Add Service Photo. Choose Take Photo or Choose from Library. Add Captions for clarity and tap Save.
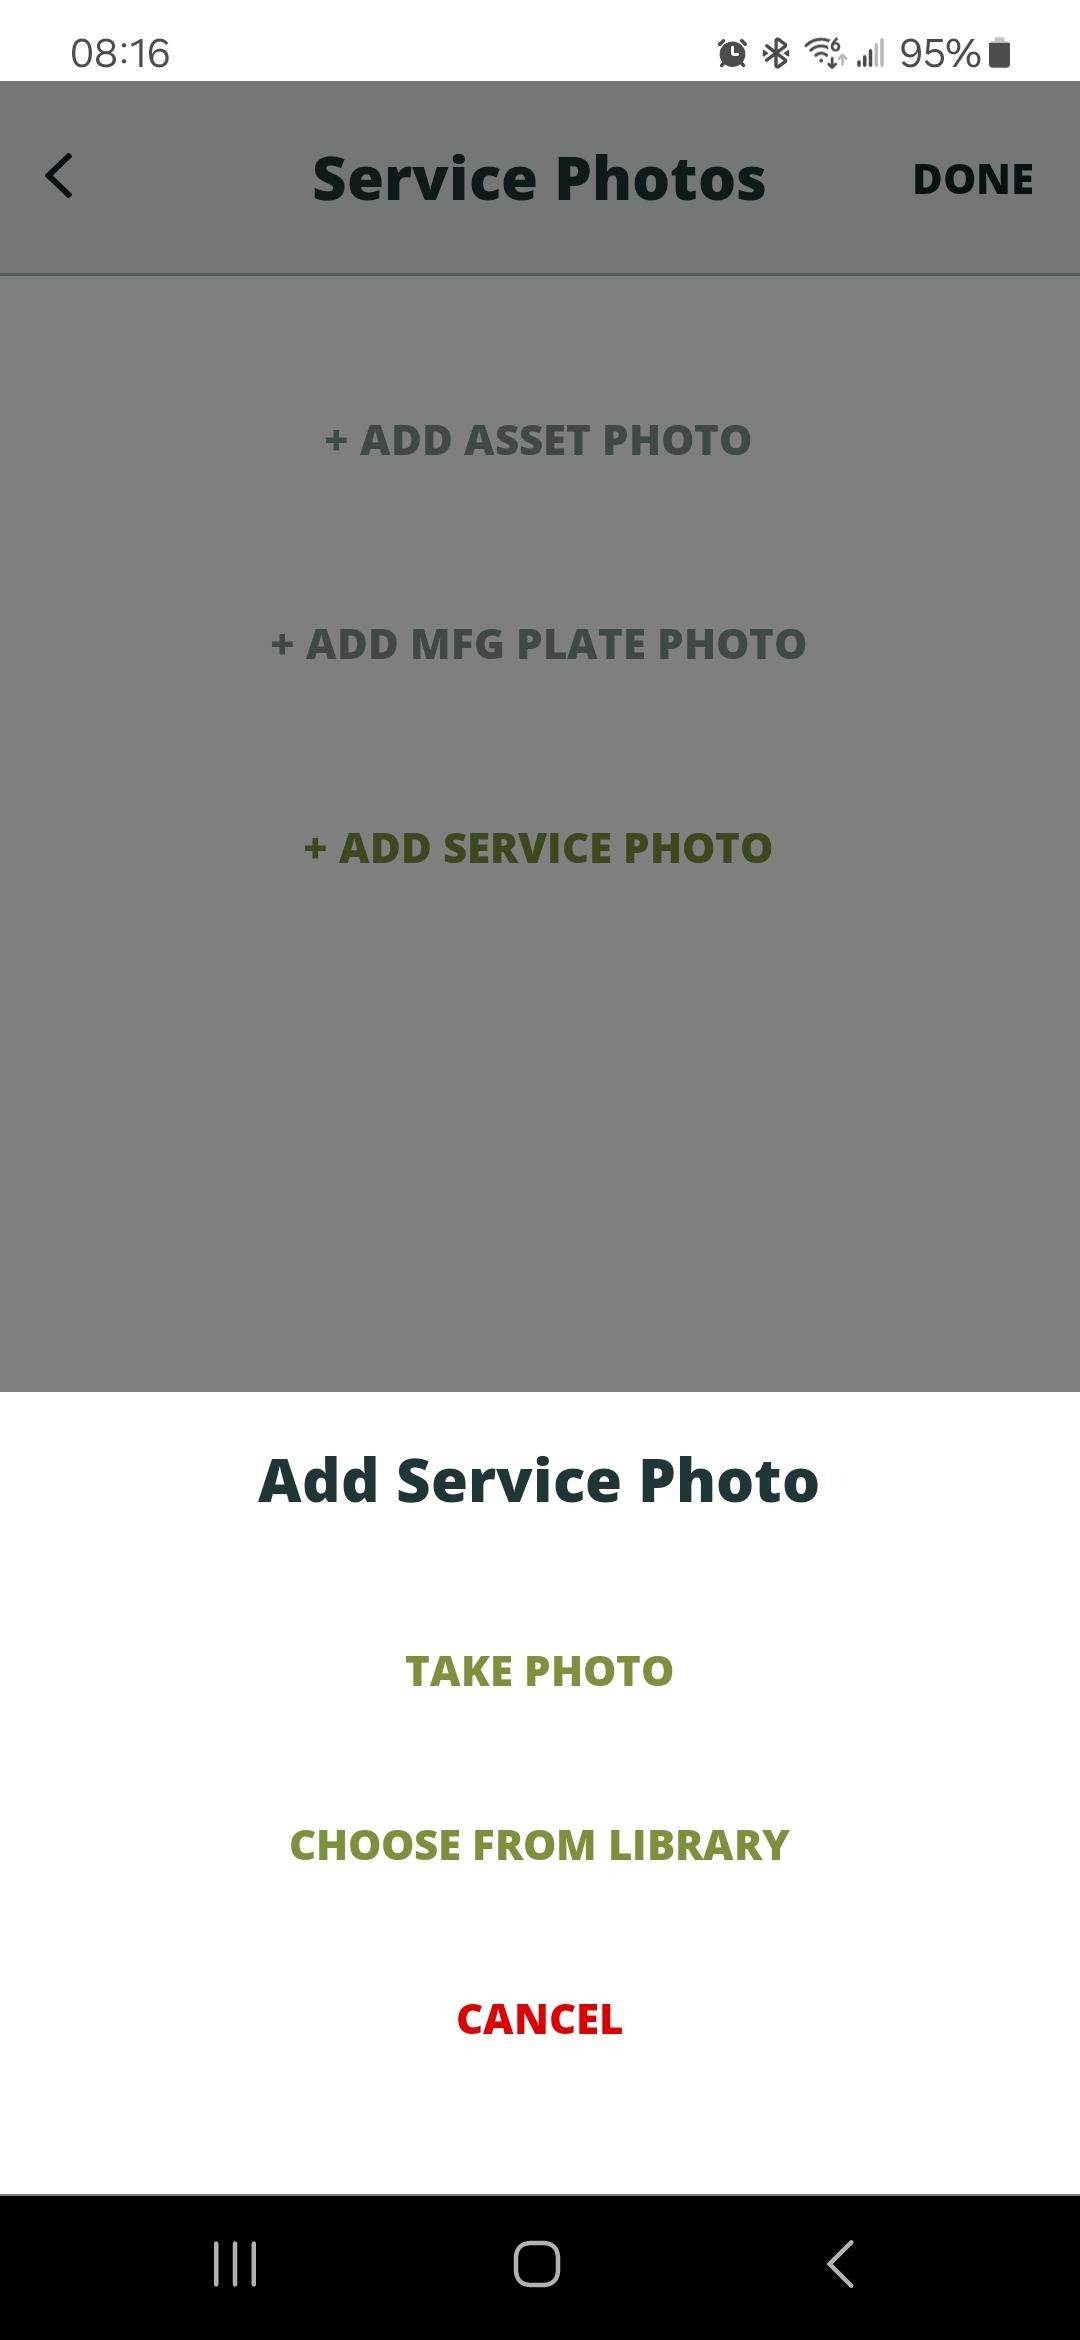
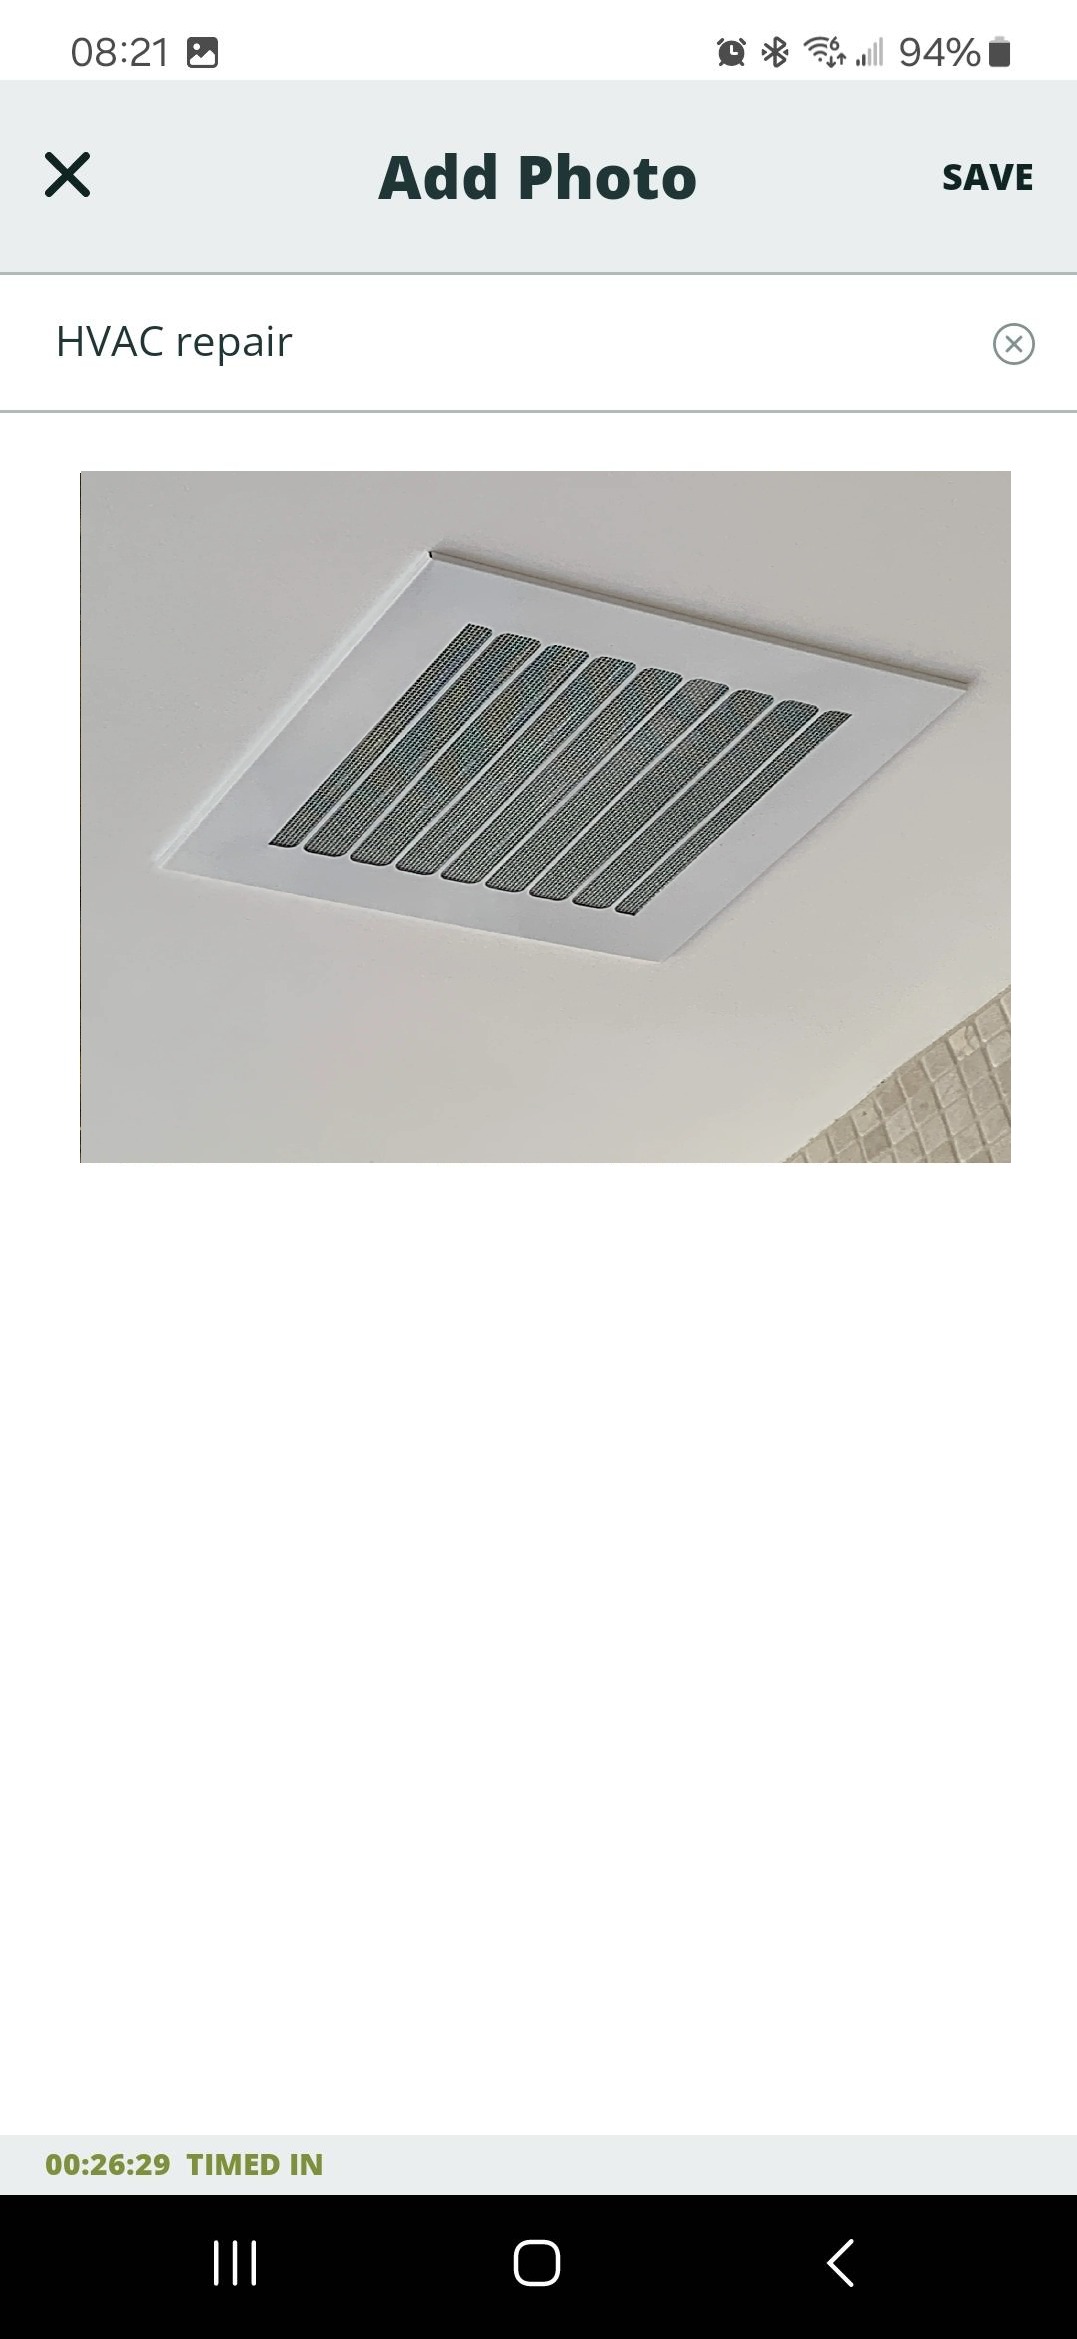
- Tap Done once all photos are added.
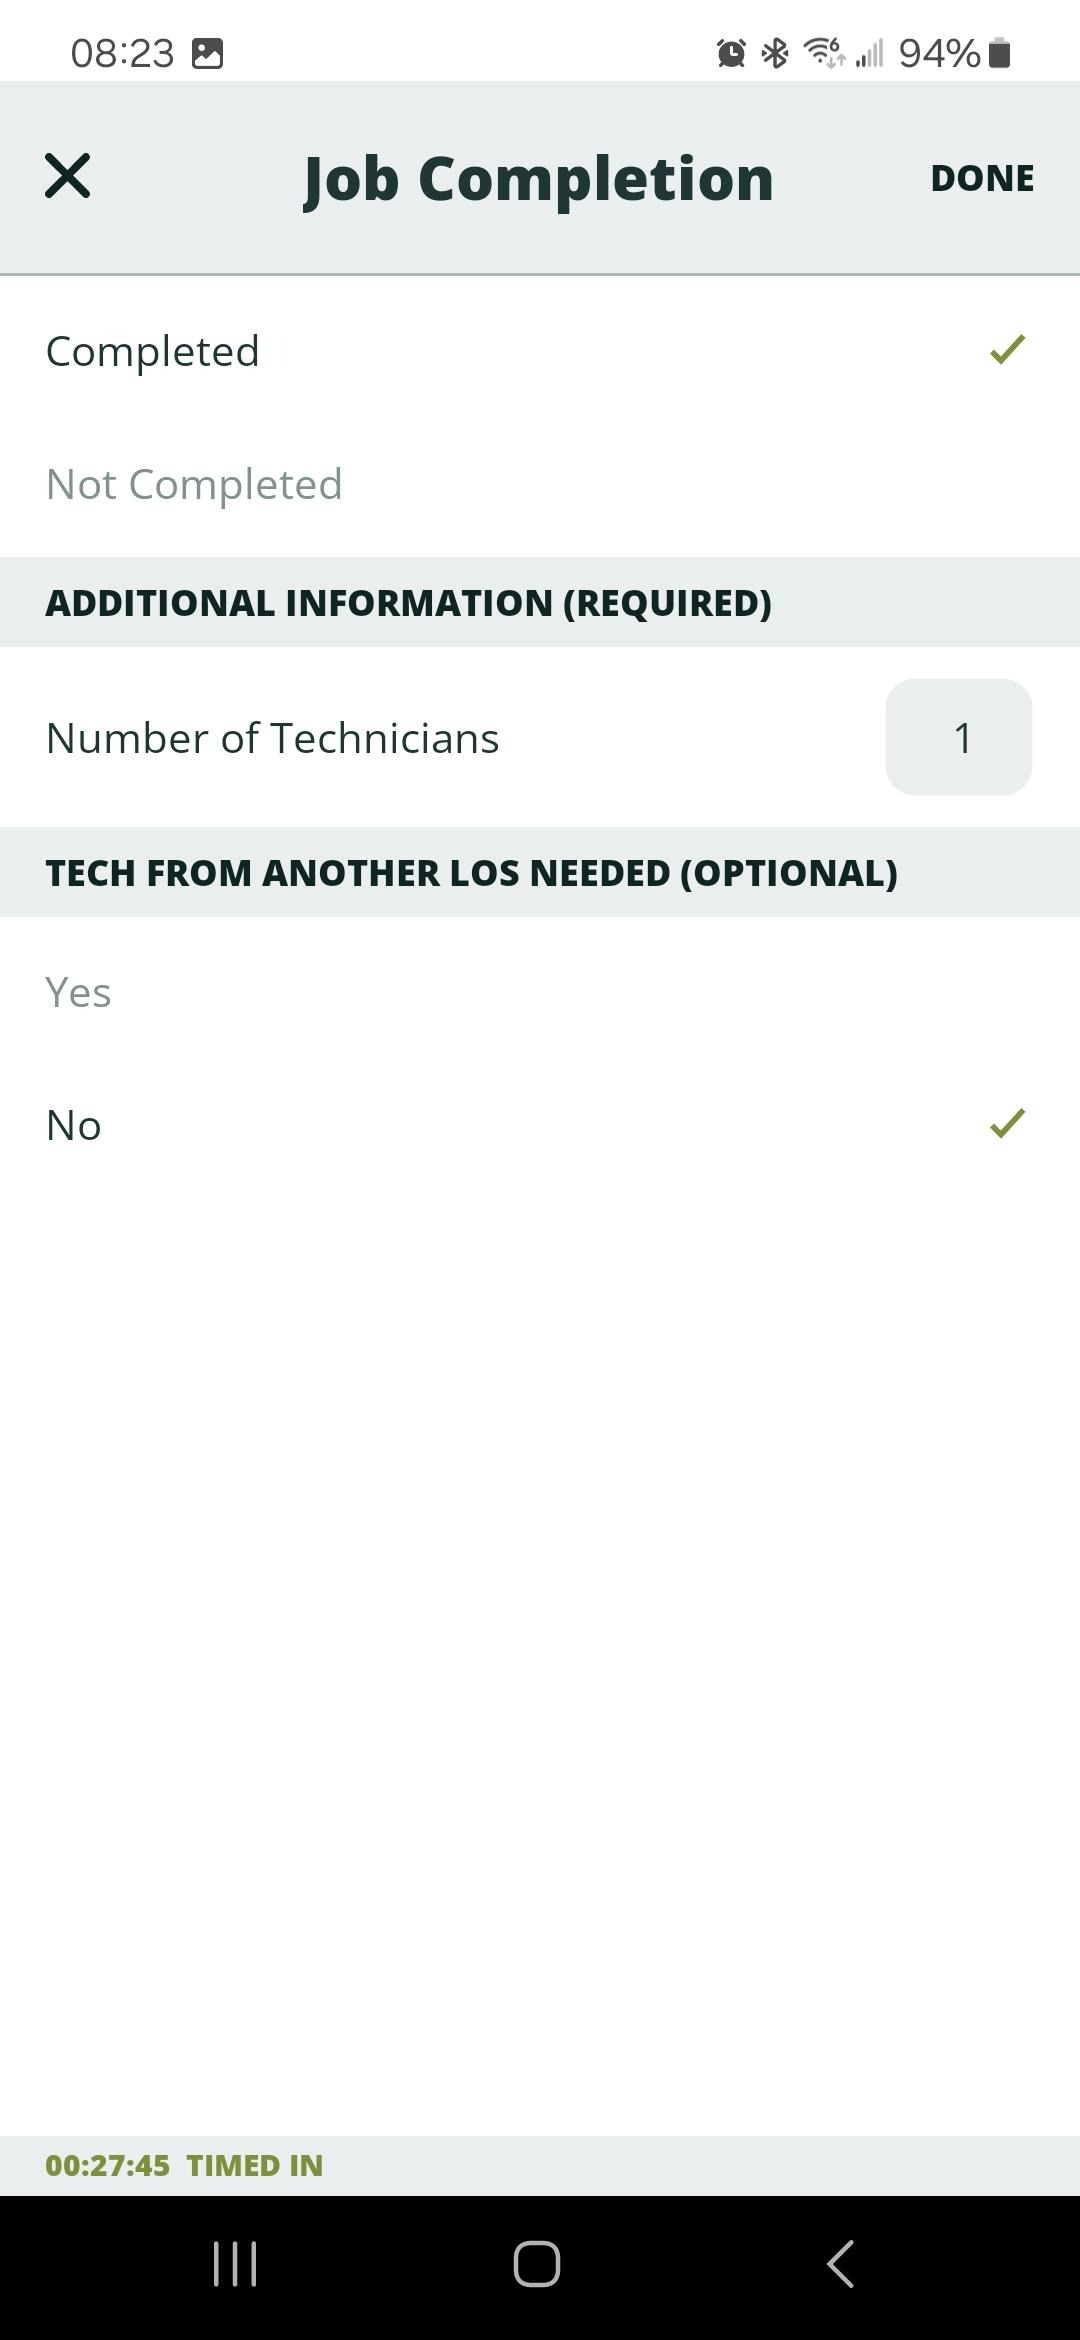
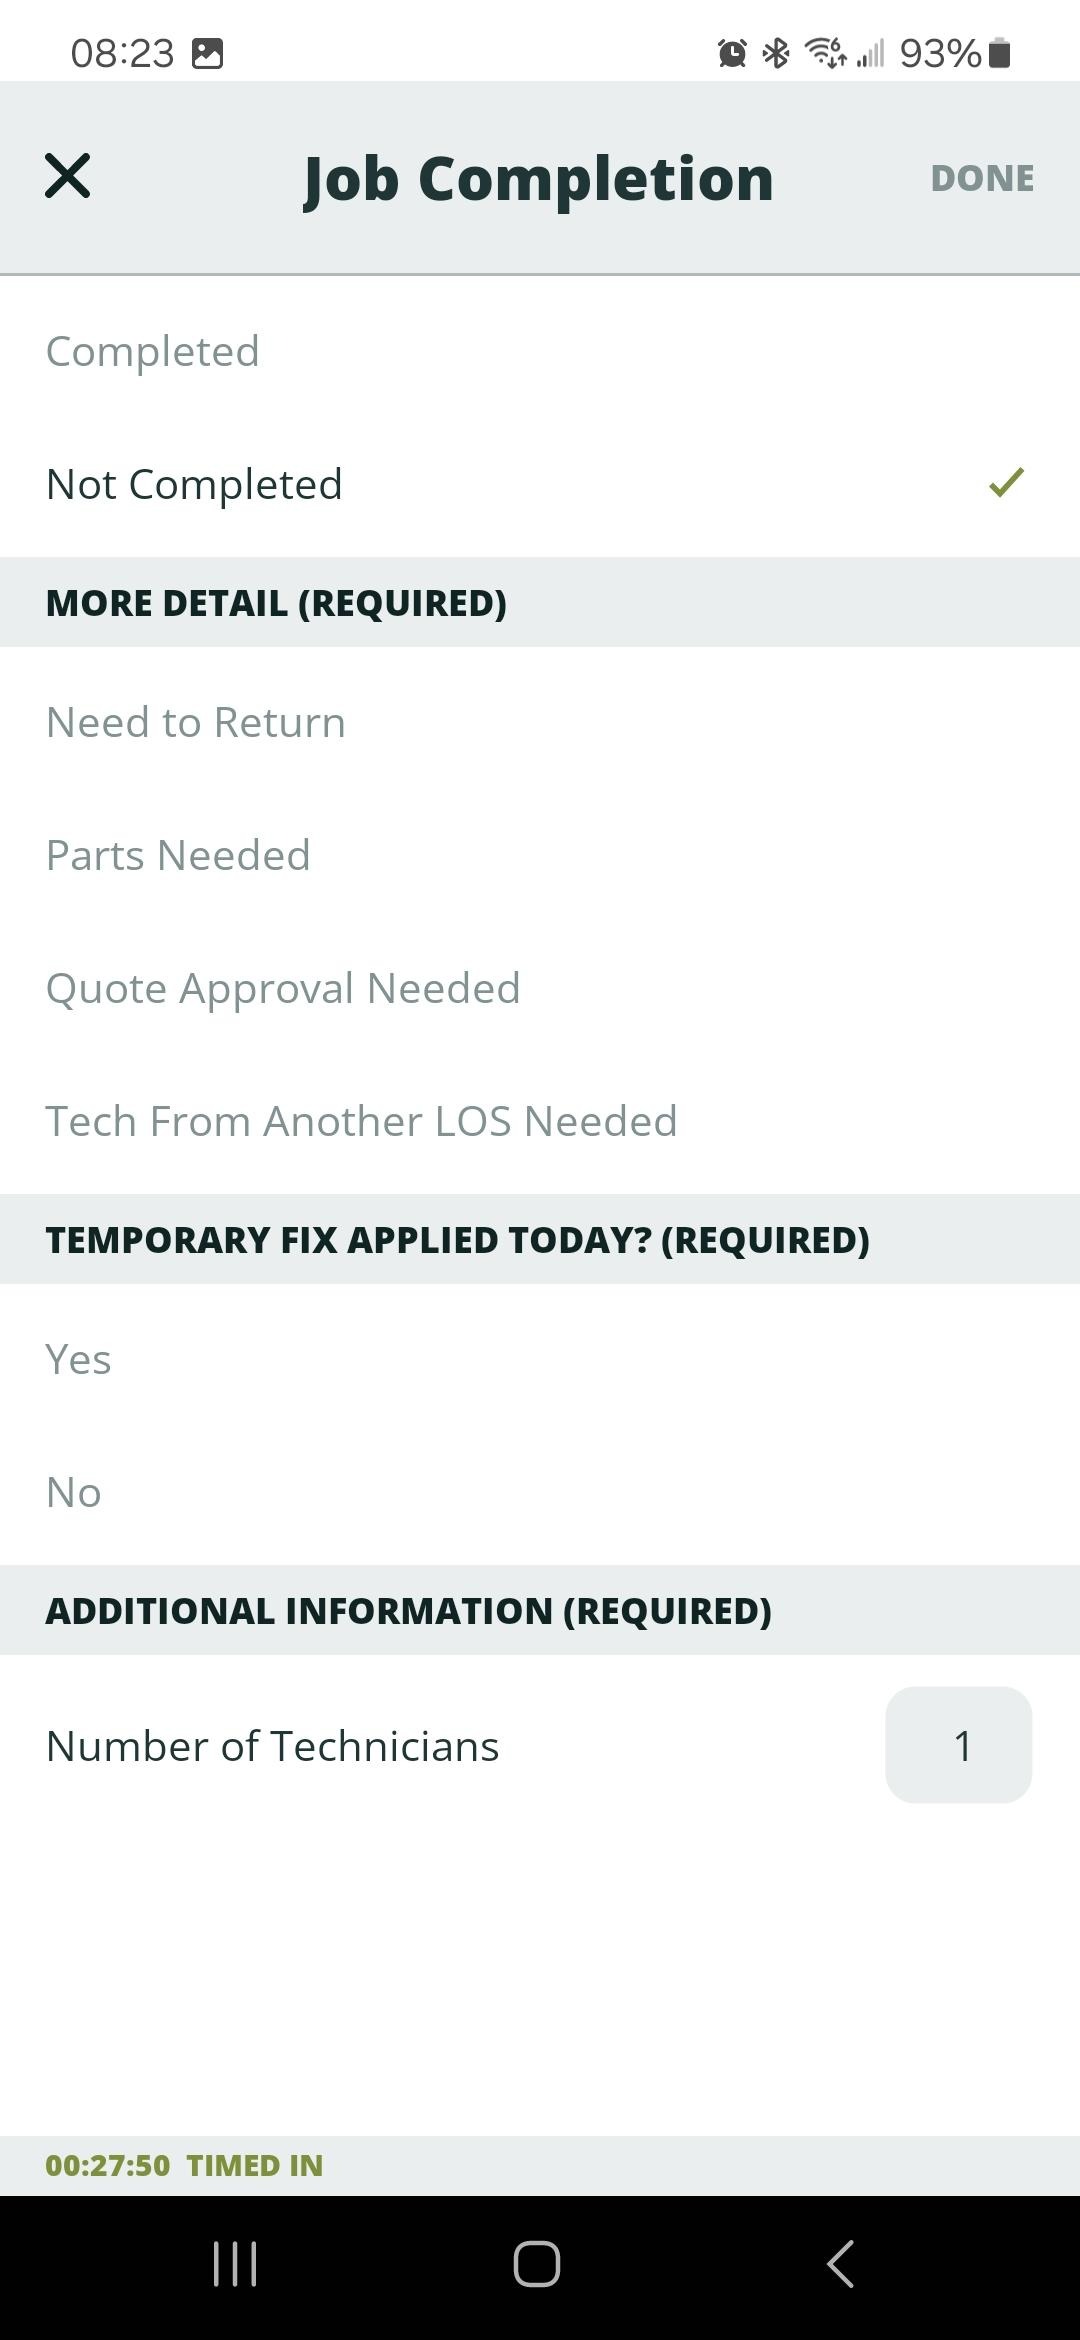
- Tap Job Completion. Indicate Completed or Not Completed, complete the required fields, then tap Done.
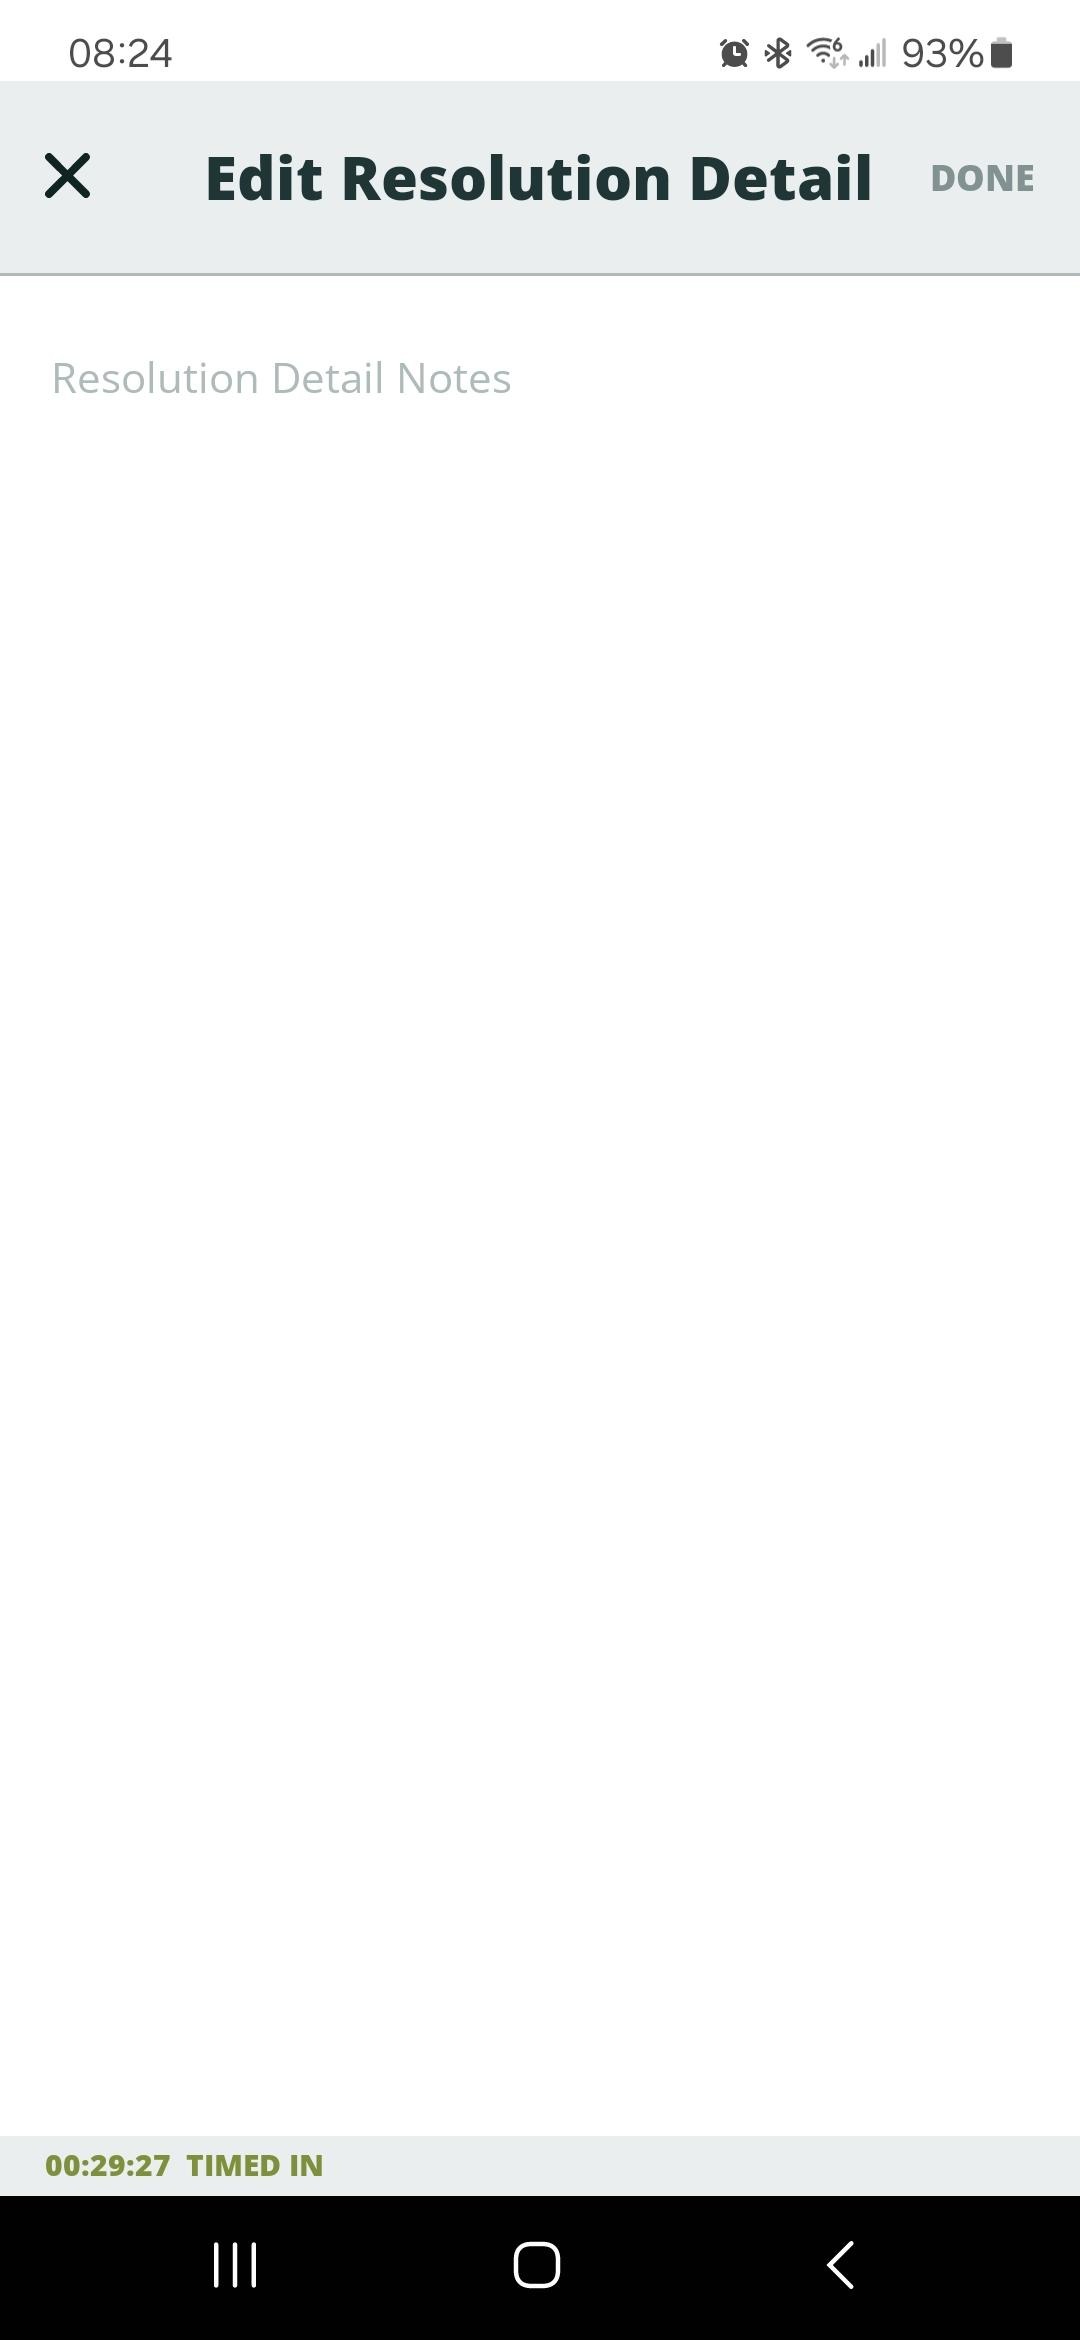
- Tap Resolution Detail. Add Resolution Notes — issue found, work performed, and pertinent details. Tap Done.
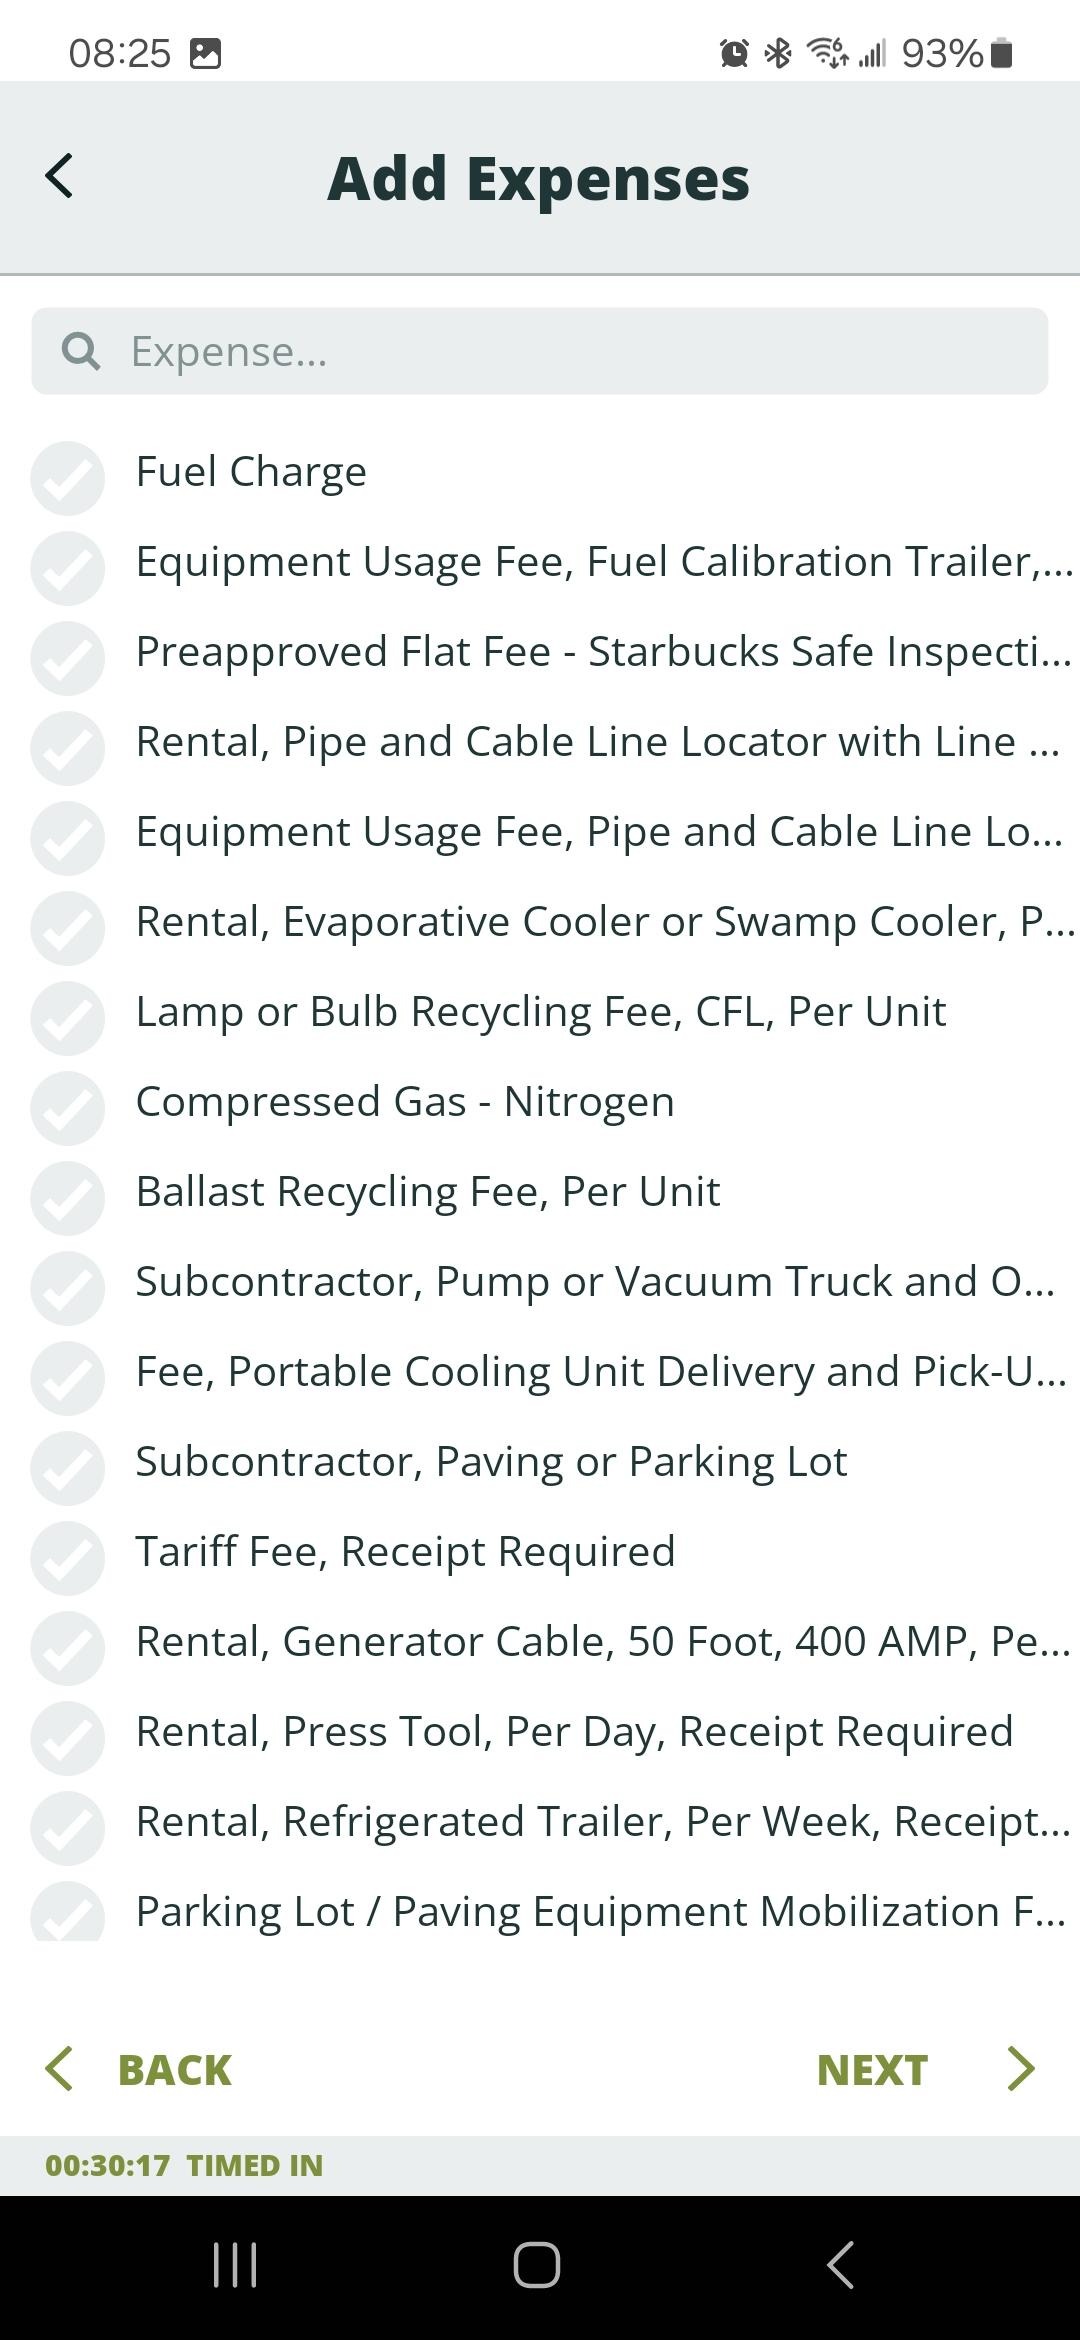
- Tap Expenses if applicable, select from the list, and tap Next.
5. Review, Sign, and Time Out
- Tap Review & Sign.
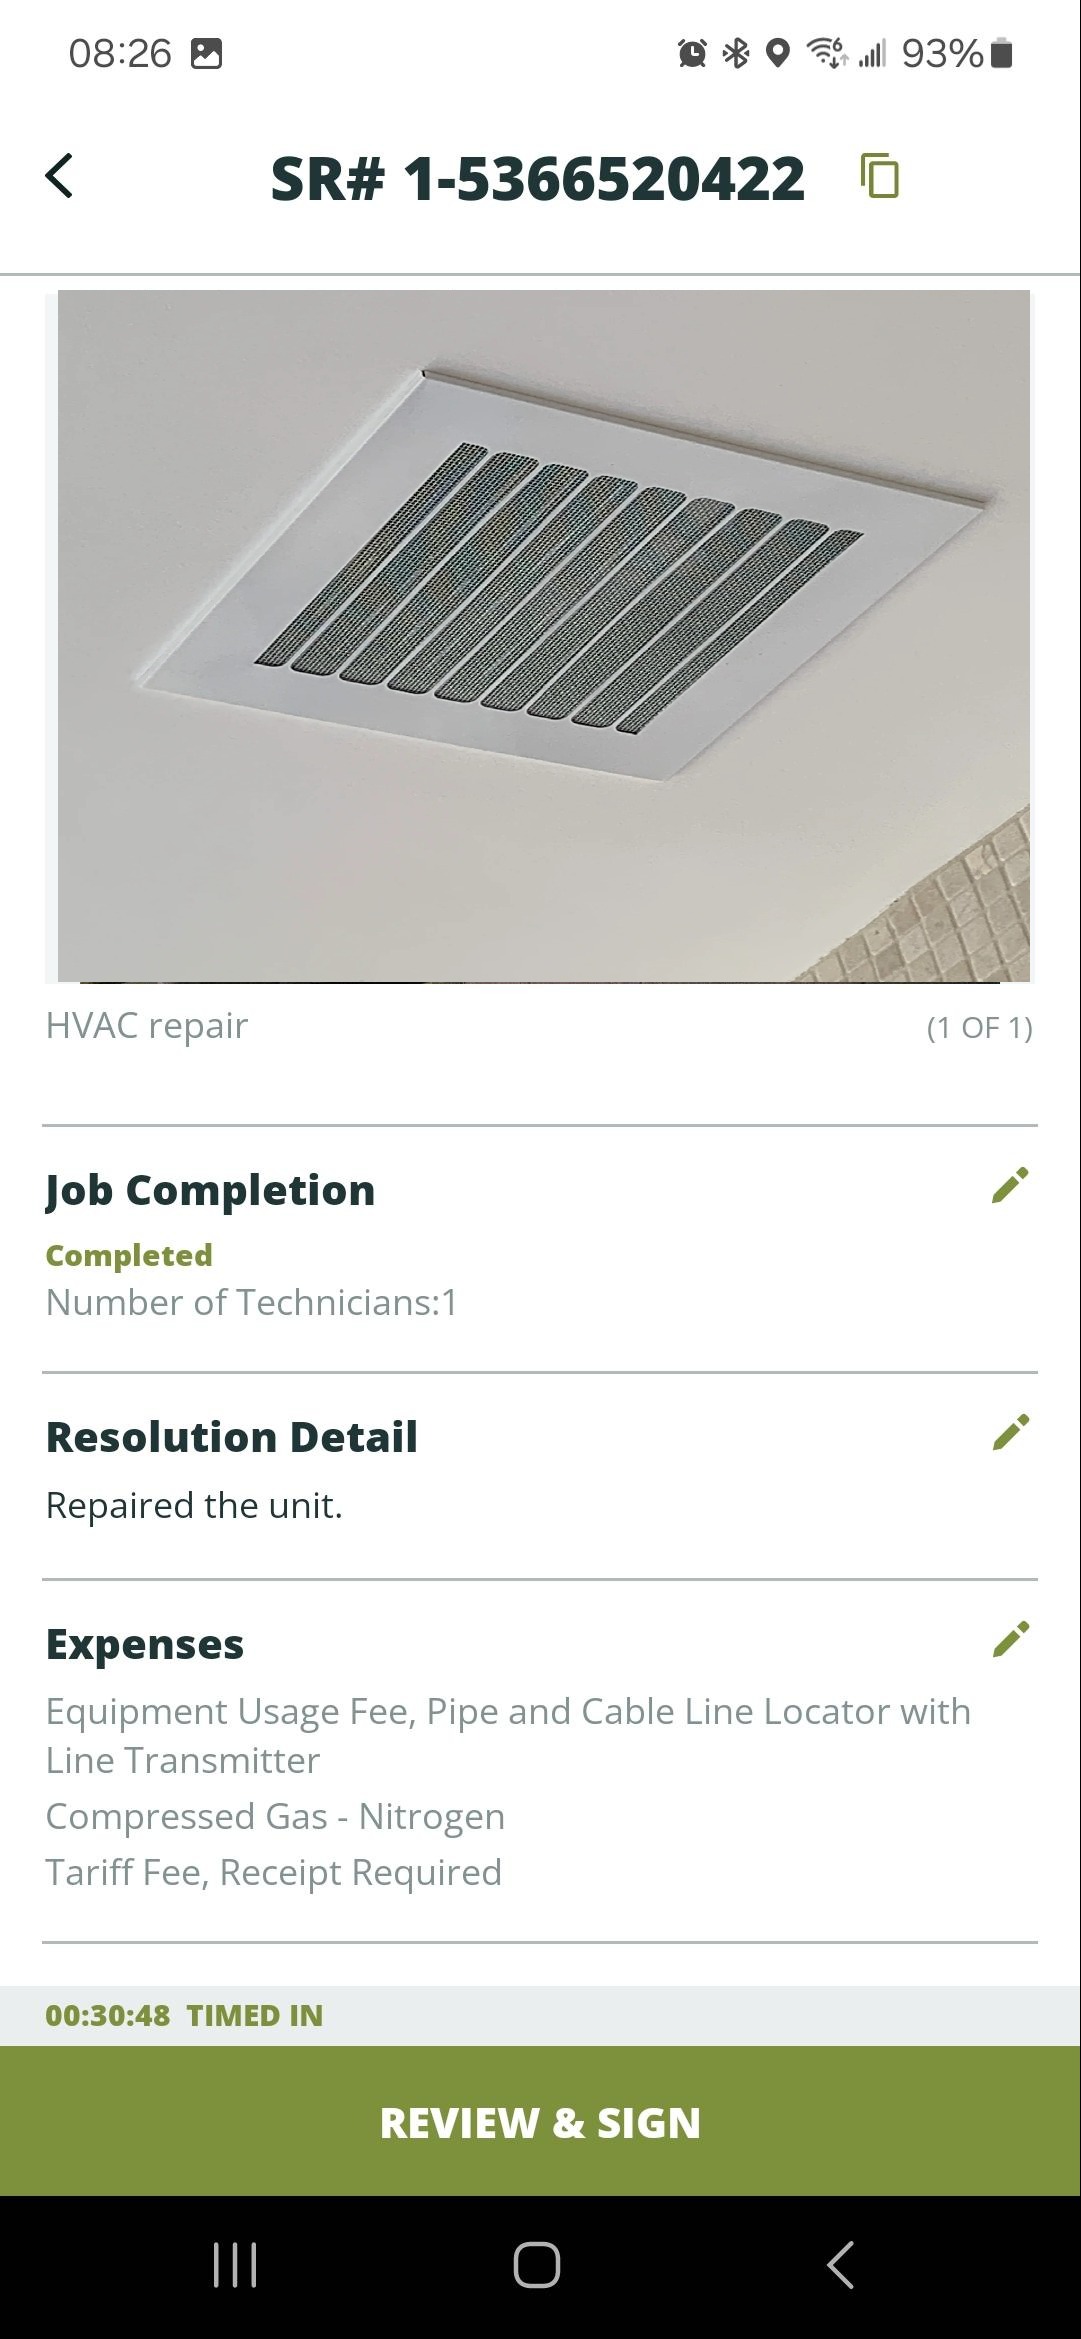
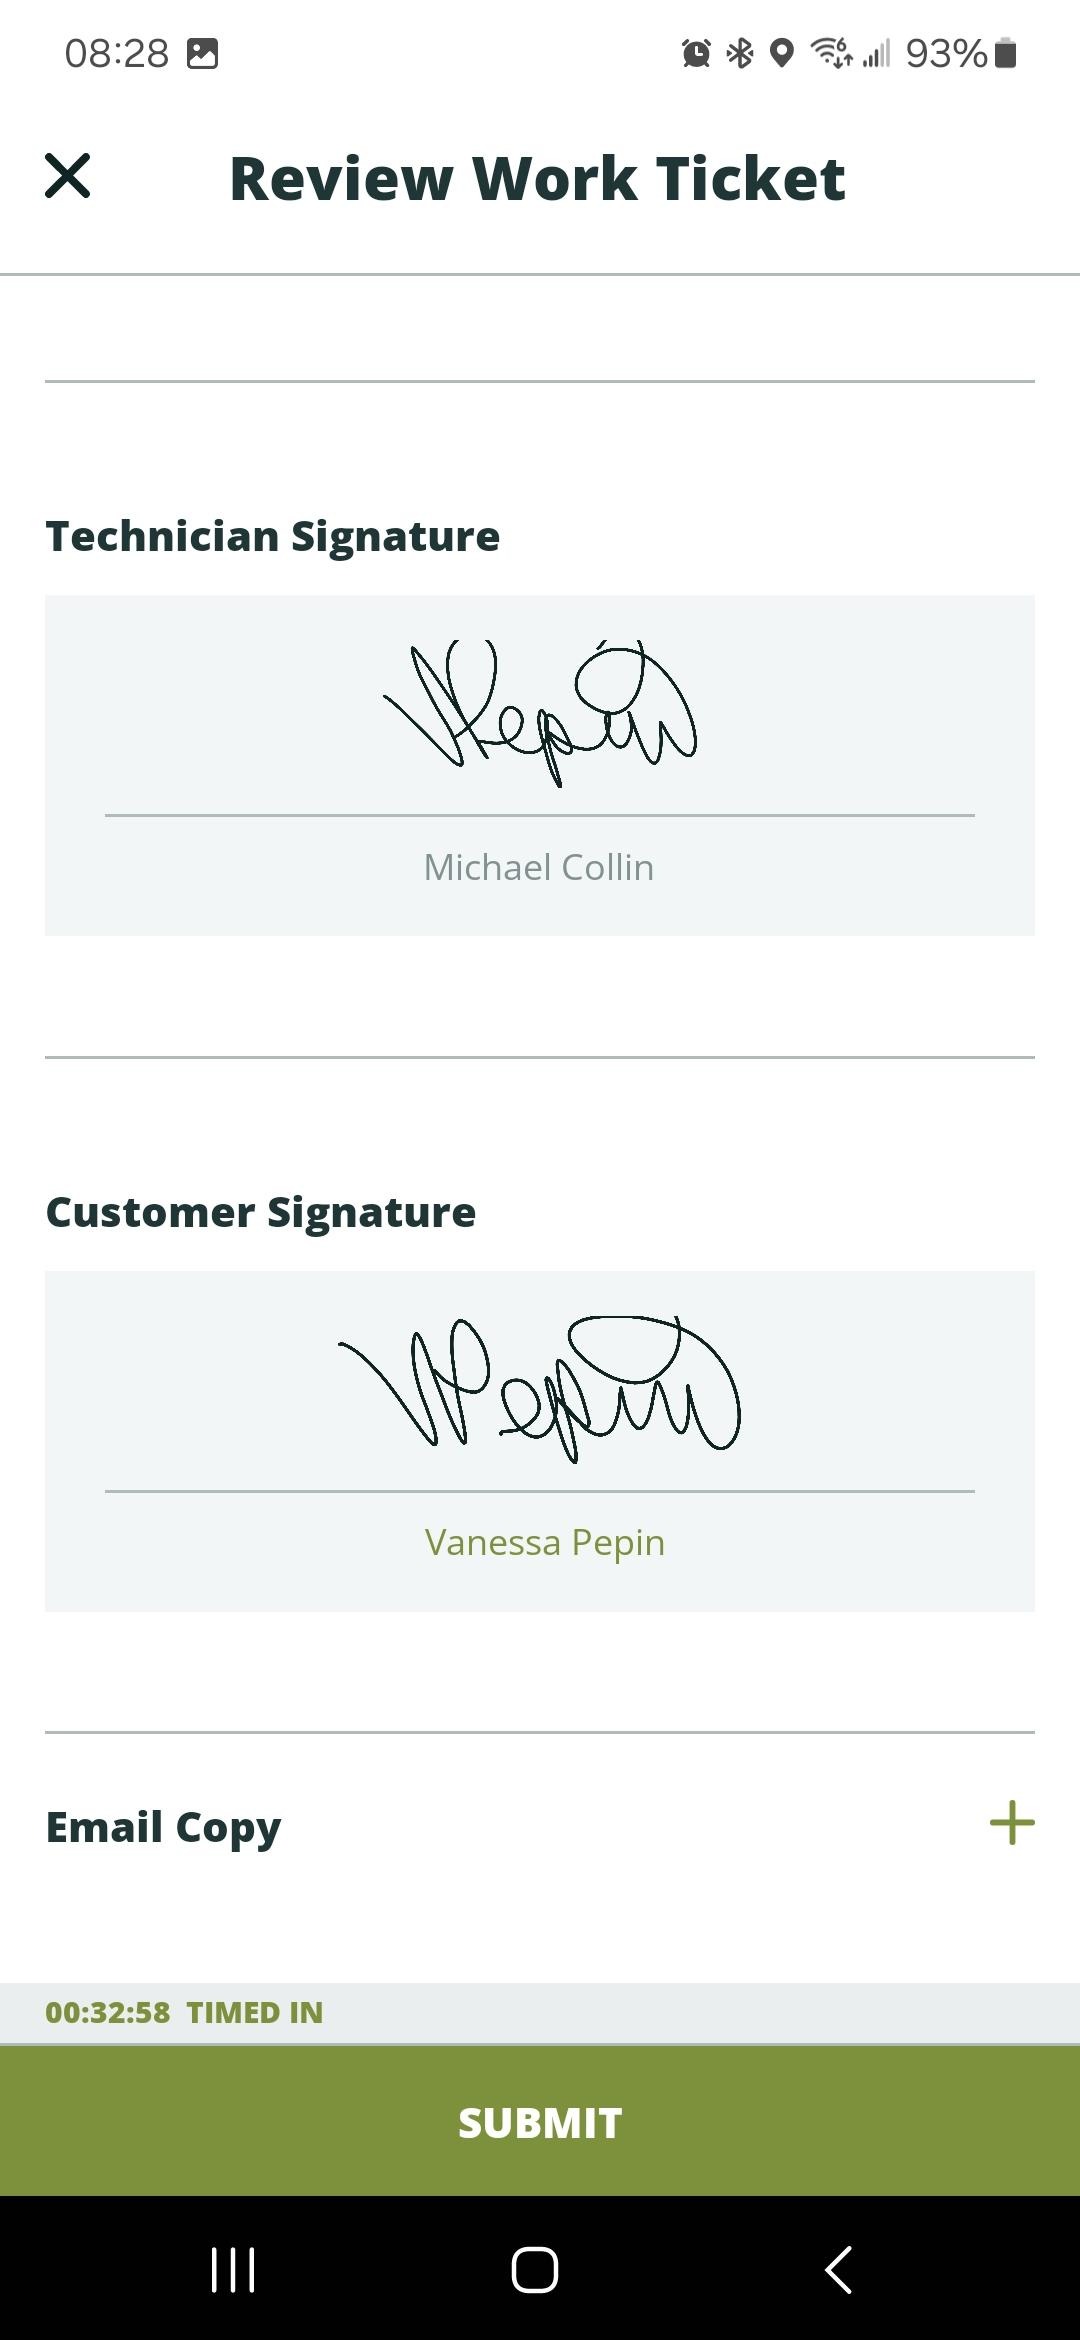
- Review all details and photos. Add your Technician Signature. Obtain the Manager on Duty signature and name. Add email addresses for work-ticket copies if desired, then tap Submit.
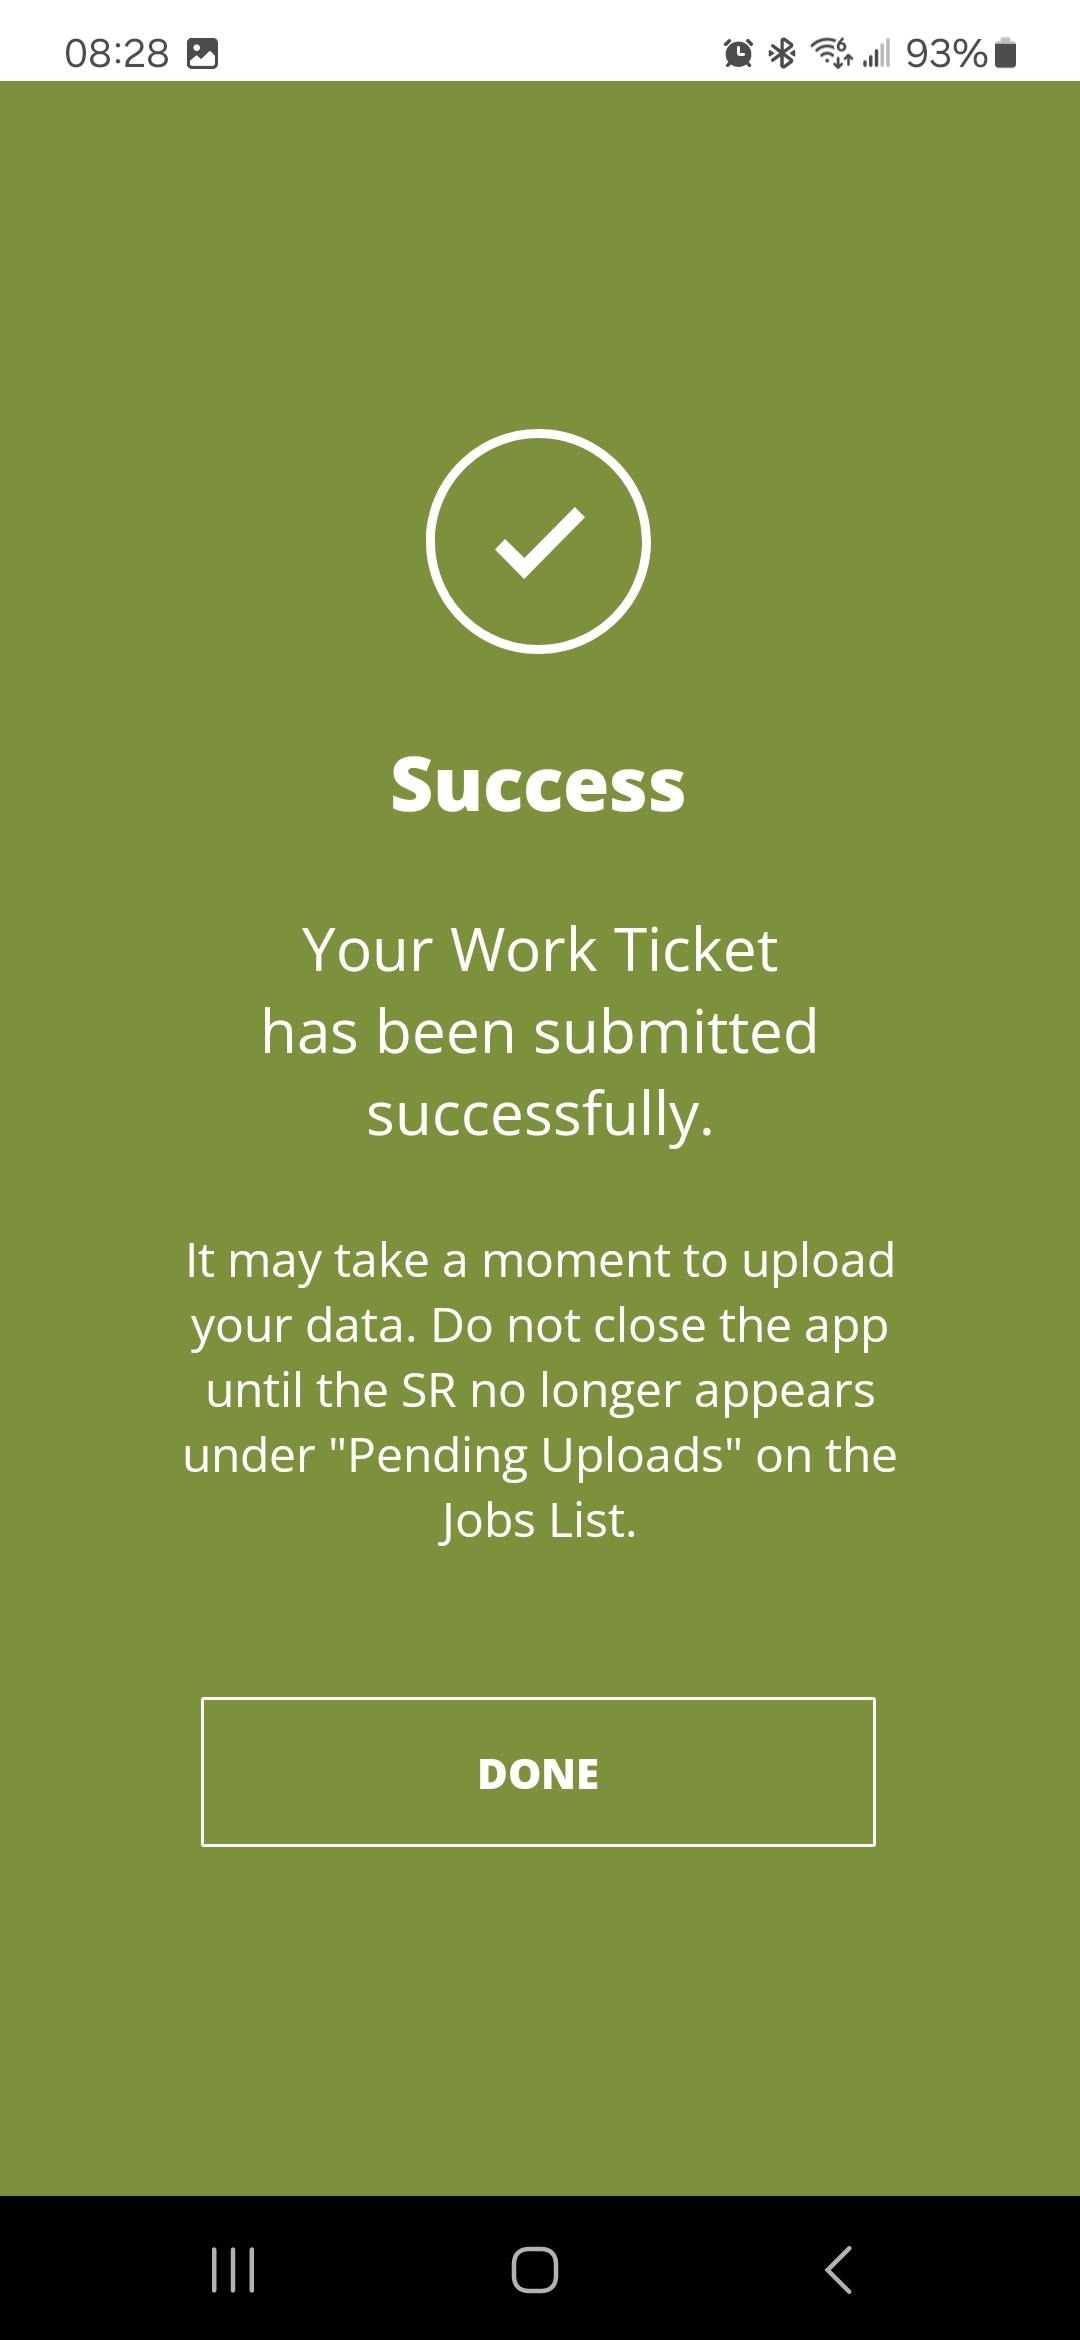
- When VixxoLink confirms your work ticket was submitted successfully, tap Done. You have successfully completed the job.
Quick Reference — On-Site Completion Checklist
| Step | What to verify |
|---|---|
| Time In | Timed in on site via geofencing before starting work |
| Photos | Before and after photos captured and uploaded with captions |
| Assets & parts | Asset, actions, and parts documented accurately |
| Resolution | Detailed resolution notes entered (cause, repair, outcome) |
| Job status | Completed or Not Completed selected with required details |
| Review & Sign | Technician and Manager on Duty signatures obtained |
| Before leaving | Work ticket submitted successfully — do not leave site without sign-off |
Related articles:
- Service Request Documentation Requirements
- Creating an Invoice in VixxoLink
- Creating a Quote in VixxoLink
- Step by Step - Work Order Process
- Service Provider FAQs
Was this article helpful?
That’s Great!
Thank you for your feedback
Sorry! We couldn't be helpful
Thank you for your feedback
Feedback sent
We appreciate your effort and will try to fix the article