Submit accurate invoices in VixxoLink so completed work is paid promptly and without rejection. This guide walks through building and submitting an invoice from the dashboard through final submission.
*Make sure your technician documented the service request in VixxoLink Mobile before leaving — time in/out, photos, resolution notes, and Review & Sign when required. Complete on-site documentation simplifies invoicing and reduces rejections.
*If you are stuck and need assistance, please call 866-988-5376 — Option 1 for payment status, Option 2 for invoice/quote help, Option 3 for VixxoLink technical support, Option 4 for dispatch/service-request questions — or click the Submit a Ticket button at the top right.
Before You Submit an Invoice
Important points about Vixxo invoices:
- Invoices must be submitted within 5 days of service completion.
- Labor, trip, parts, and expenses must match time on site, contract rates, and approved quote/NTE amounts.
- Attach your in-house invoice PDF, the signed work ticket, and before/after photos to avoid rejection.
- If invoice total exceeds NTE, request an NTE increase before completing the work — not at invoice time.
See Service Request Documentation Requirements for on-site documentation standards.
1. Open the Service Request and Start the Invoice
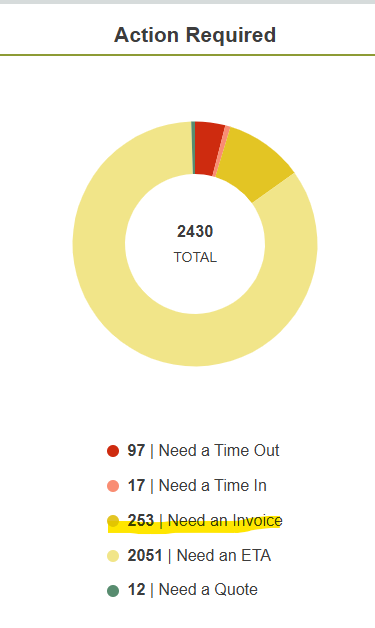
- From the VixxoLink dashboard, click Need an Invoice to view all jobs requiring an invoice.
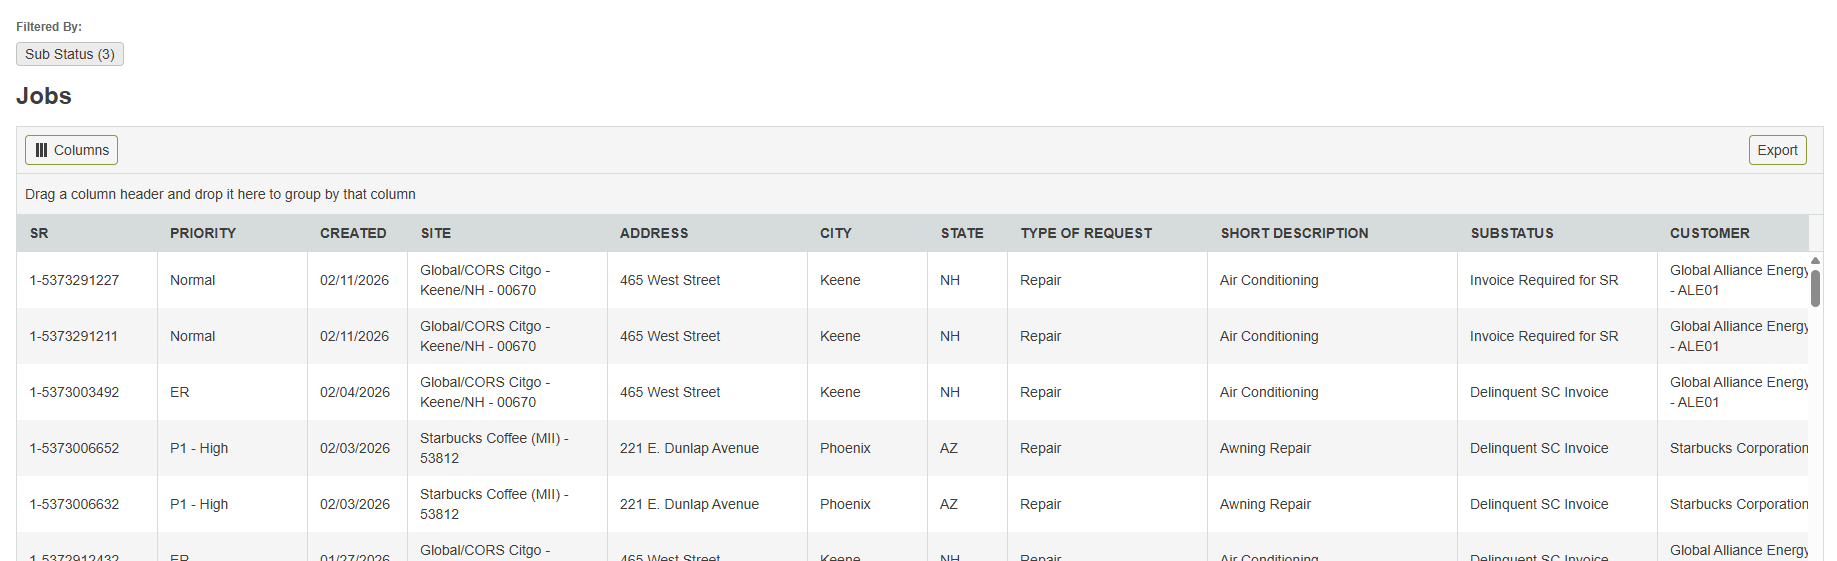
- Review the list and click the row for the service request you need to invoice.
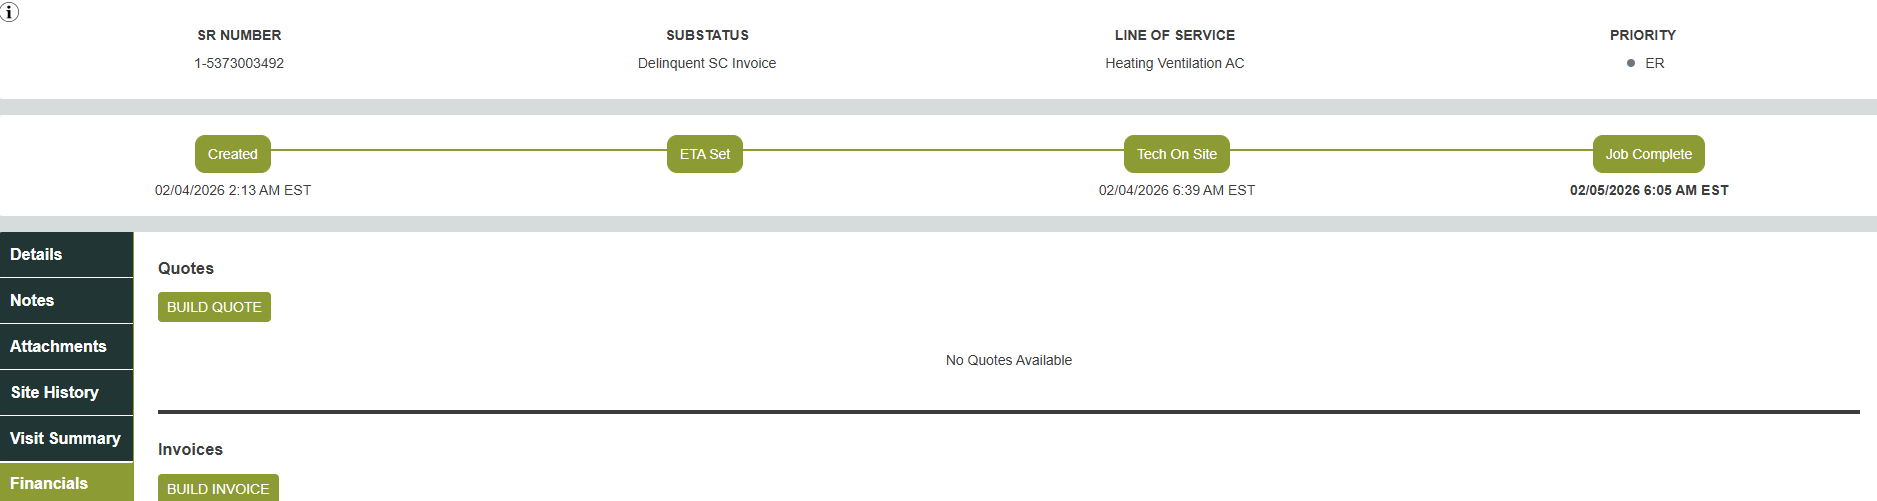
- Open the service request, click Financials on the left, and click Build Invoice.
2. Verify Time and Invoice Number
- Verify the time in/out and number of technicians. If changes are needed, contact the service center so they can adjust before you invoice — discrepancies between time on site and time invoiced commonly cause rejection.

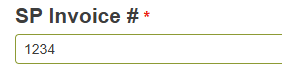
- Enter the invoice number from your accounting system for cross-reference.
3. Labor and Trip Charges
- Labor — The system auto-populates labor based on time in/out, number of technicians, and contract rates. Review for accuracy. If you change rates using the hammer icon, enter detailed notes in the Reason box. Unexplained rate changes trigger AP review.

- Trip charge — The trip charge auto-populates from contract rates. Contact your Service Provider Manager to update travel rates for future work in that area if ongoing trip issues occur.

4. Assets, Parts, and Expenses
Add assets, parts, and expenses for work performed on site. *Floors, toilets, walls, and similar building elements are not considered assets.
- If the line of service requires an asset, VixxoLink will prompt you to add the asset before adding parts. Click + Add Asset when required, or + Parts when no asset is needed.
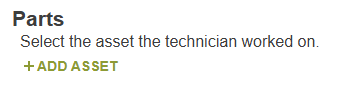
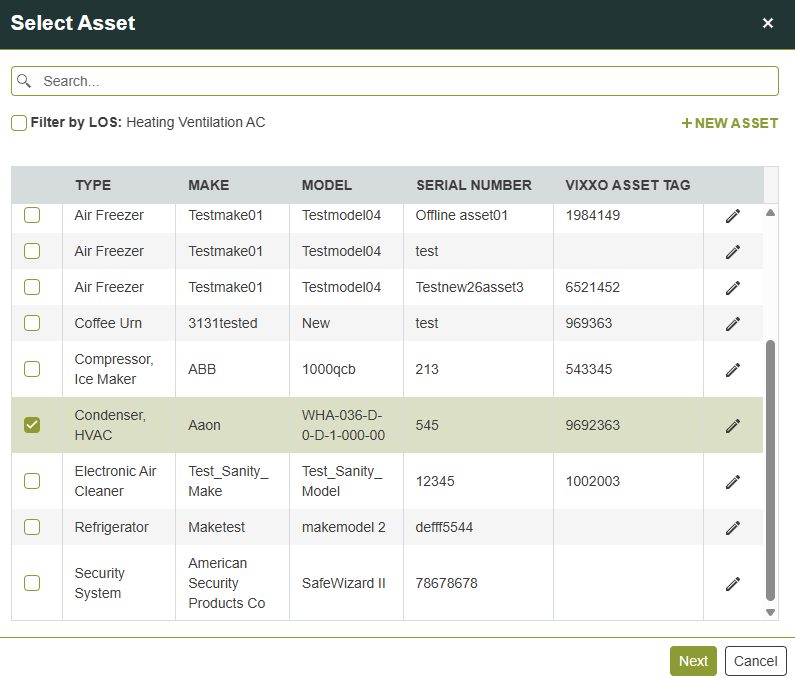
- In the Add Assets window, select the appropriate asset. If it is not listed, uncheck Filter by LOS and search. Click Next.
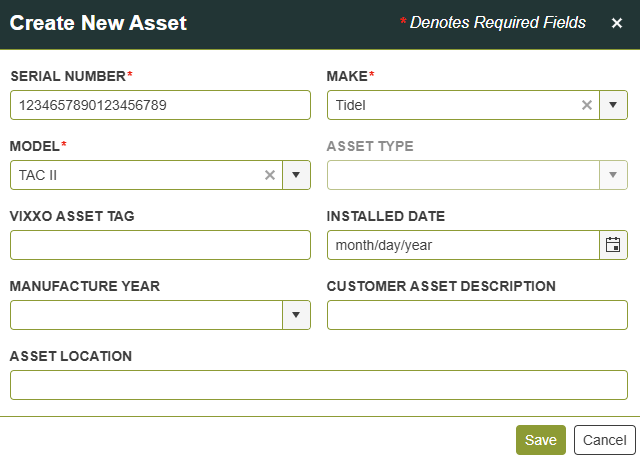
- If the asset is still not found, click New Asset, enter the asset information, and click Save.
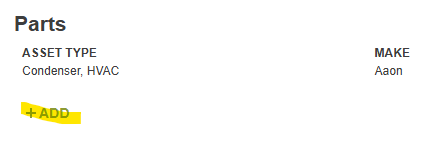
- After the asset is added, click + Add under Parts to include parts used. Skip to Expenses if no parts apply.
- When adding parts, uncheck Filter by LOS and search if needed. If the part is not found, click Request It Here, complete the form, and submit — Vixxo will notify you when the part is available. Otherwise select the part and click Next.
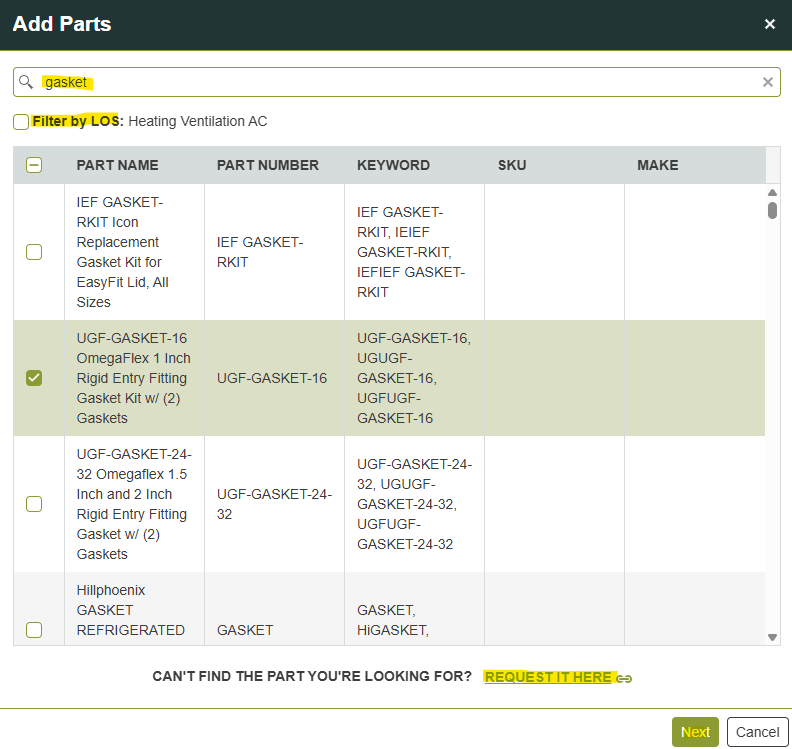
- On the invoice page, select the action performed (e.g., Replaced), enter quantity, and enter the unit price billed to Vixxo (not your cost). If the price exceeds the suggested amount, accept the suggested price or enter notes — billing above suggested price triggers audit of all parts and labor on the request.

- Expenses — Under Expenses, click + Add for incurred expenses (equipment fee, rental, etc.). Search, select, and save the expense.
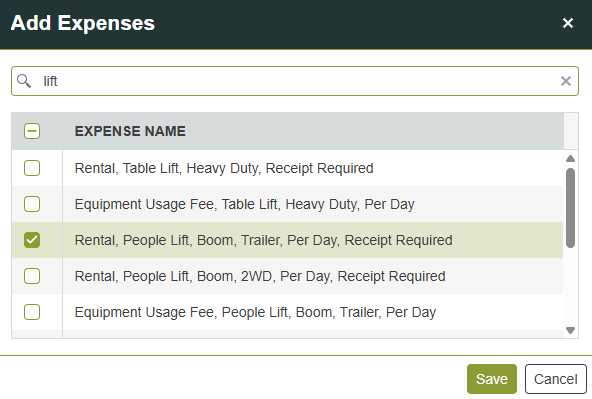
- Enter quantity and unit price for each expense. Repeat for additional expenses.

5. Tax, Documentation, Attachments, and Submit
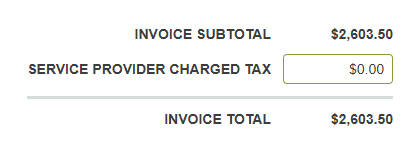
- If applicable, enter Service Provider Charged Tax and review all invoice totals.
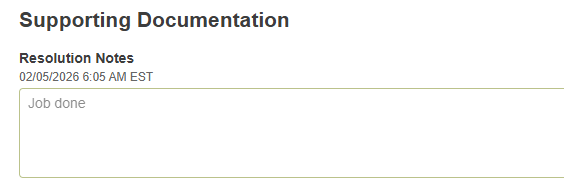
- Under Supporting Documentation, enter detailed resolution notes — cause found, repairs performed, resolution, and testing to confirm functionality. Vague notes (e.g., "repaired unit") are commonly rejected.
- Under Additional Information, enter any other details relevant to the invoice (warranty notes, special circumstances, etc.).

- Click Upload to attach your in-house invoice PDF, required receipts, the signed work ticket, and before/after photos. Missing documentation commonly causes invoice rejection.

- Click Review Invoice at the bottom right.
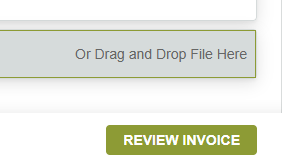
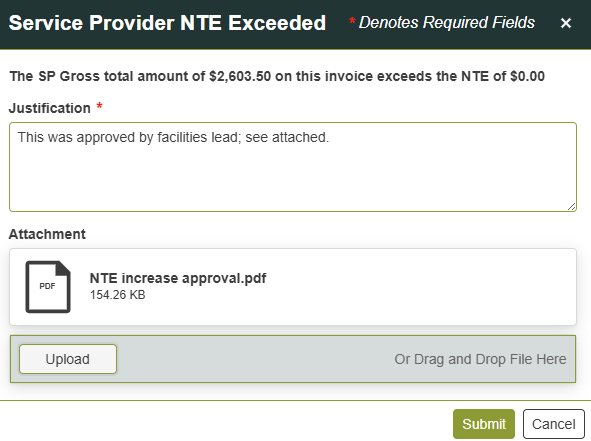
- If your invoice exceeds the NTE amount, justify why and add relevant attachments before clicking Submit. *NTE increases should always be requested prior to the work being completed.
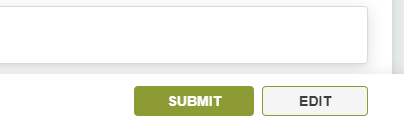
- Review all entered information. If correct, click Submit to send the invoice to Vixxo. If changes are needed, click Edit. After submission, a confirmation message appears and you return to the service request details page.
Quick Reference — Invoice Submission Checklist
| Step | What to verify |
|---|---|
| On site (before invoicing) | Time in/out, photos, resolution notes, Review & Sign completed in VixxoLink Mobile |
| Timing | Invoice submitted within 5 days of service completion |
| Time & labor | Time in/out and technician count verified; labor matches contract rates |
| Parts & expenses | Assets, parts, and expenses match work performed; unit prices billed to Vixxo |
| Rates | Contract rates used; hammer-icon changes include Reason notes |
| NTE | Invoice total within approved NTE or NTE increase requested before work |
| Resolution notes | Detailed cause, repair, resolution, and testing documented |
| Attachments | In-house invoice PDF, signed work ticket, before/after photos uploaded |
| Submit | Review Invoice → Submit; watch for confirmation message |
Related articles:
- Service Request Documentation Requirements
- Payment Delays
- Creating a Quote in VixxoLink
- Service Provider FAQs
- Timing In/Out and Completing a Service Request
- Step by Step - Work Order Process
- Preventative Maintenance (PM) Bulk Invoicing
Was this article helpful?
That’s Great!
Thank you for your feedback
Sorry! We couldn't be helpful
Thank you for your feedback
Feedback sent
We appreciate your effort and will try to fix the article