Submit Preventative Maintenance (PM) invoices in bulk through VixxoLink when you have multiple completed PM jobs to invoice at once. This guide covers downloading the template, preparing your spreadsheet and invoice files, and uploading the ZIP.
*This feature is for Preventative Maintenance service requests only. For reactive work, follow Creating an Invoice in VixxoLink.
*If you are stuck and need assistance, please call 866-988-5376 — Option 1 for payment status, Option 2 for invoice/quote help, Option 3 for VixxoLink technical support, Option 4 for dispatch/service-request questions — or click the Submit a Ticket button at the top right.
1. Open PM Invoice Bulk Upload
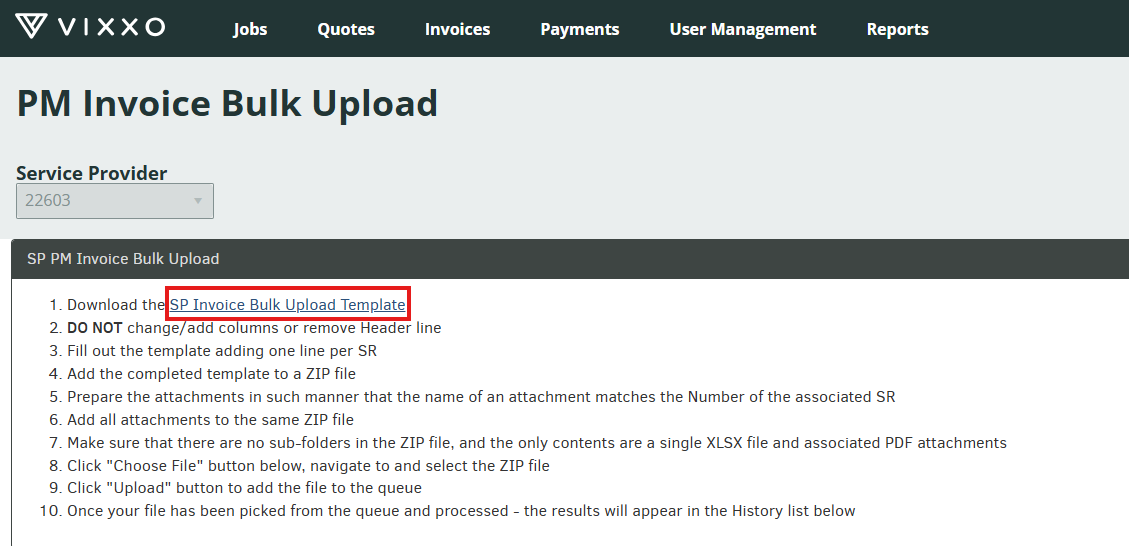
- From the VixxoLink Back-Office dashboard, mouse over Invoices and click PM Invoice Bulk Upload.

- Click SP Invoice Bulk Upload Template to download the Excel file. Review the instructions on the template.
2. Complete the Spreadsheet
- Open the downloaded Excel file. An example row shows the required format — overwrite it with your actual invoice data:
SR Number — Vixxo service request number
Vendor Invoice Number — Your company's invoice number
Work Date — Date PM was completed
Tax Amount — Tax invoiced, if applicable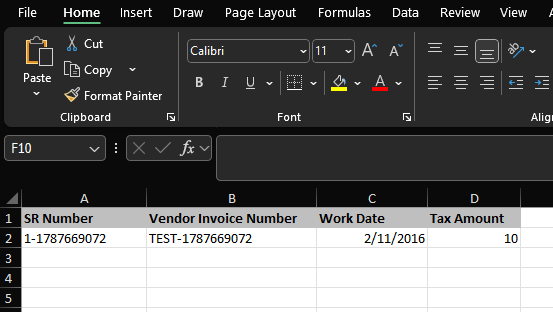
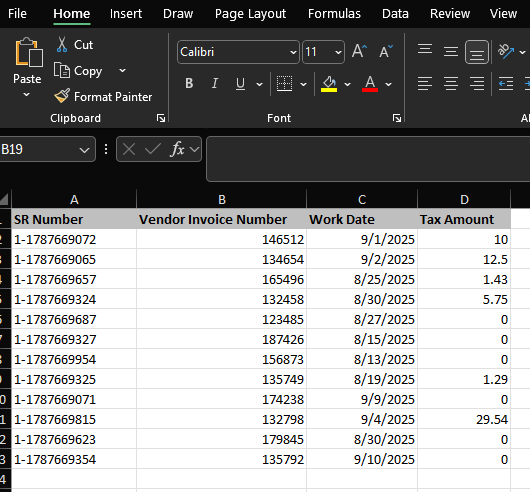
- Add a row for each PM invoice you are submitting. Save the file in an easily accessible folder.
3. Prepare Invoice Files and ZIP
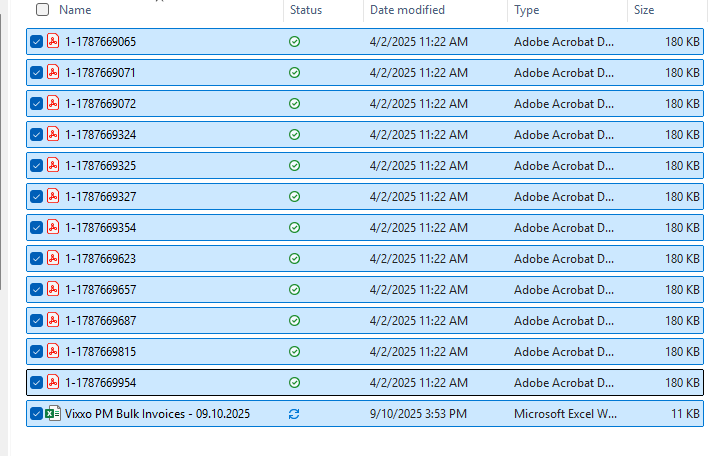
- Add a copy of each invoice PDF to the same folder as the spreadsheet. Rename each invoice file to match its SR Number in the spreadsheet.
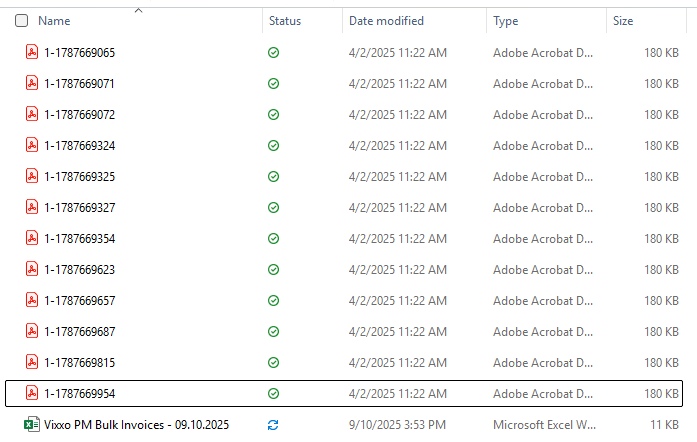
- Ensure none of the files are currently open.
- Select all files in the folder — invoices and spreadsheet.
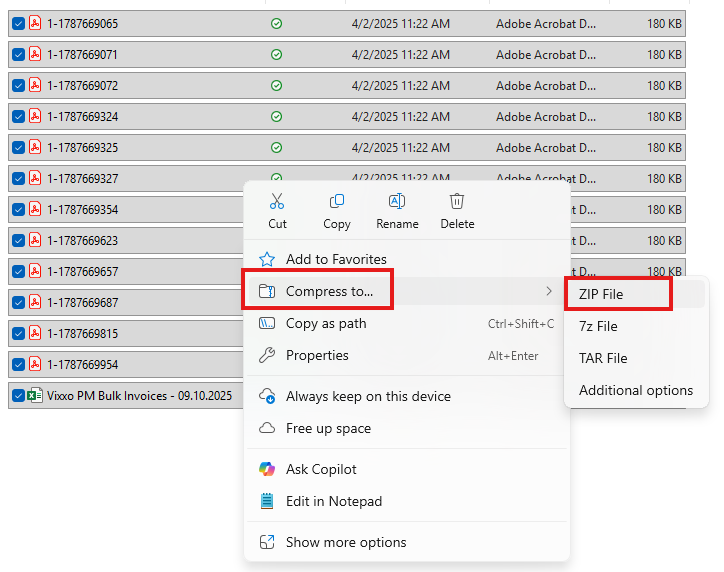
- Right-click any selected file, then click Compress to… and choose ZIP File.
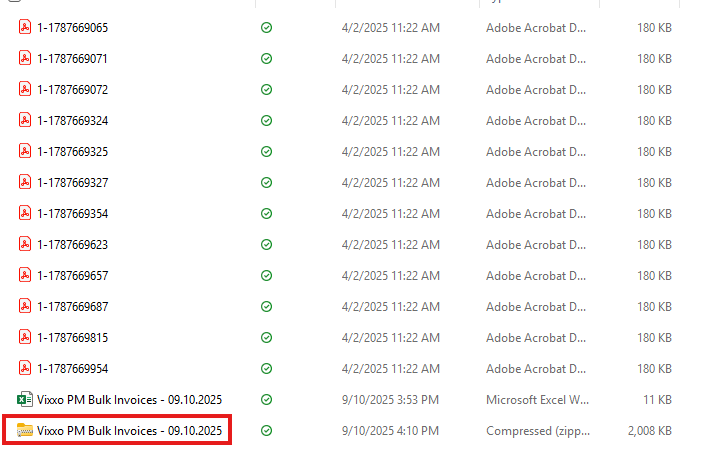
- Rename the ZIP file to something you can easily identify.
4. Upload and Review Status
- Back in VixxoLink on the PM Invoice Bulk Upload page, click Choose File.
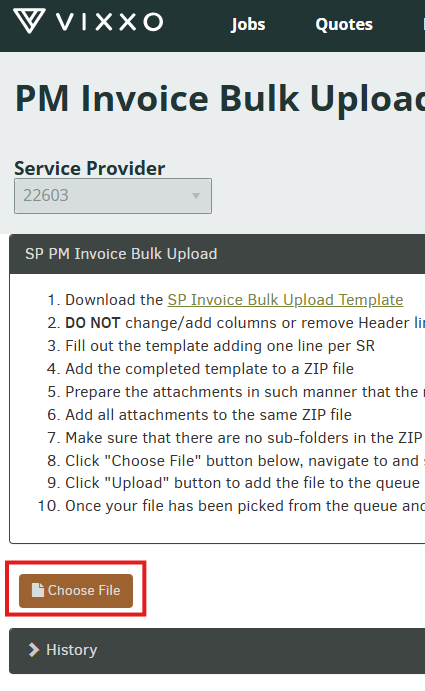
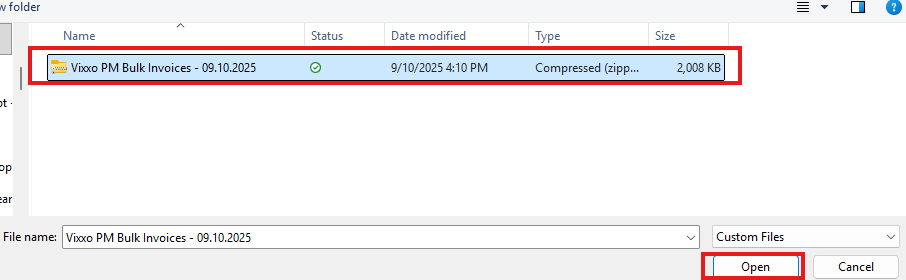
- Navigate to your ZIP file, select it, and click Open.
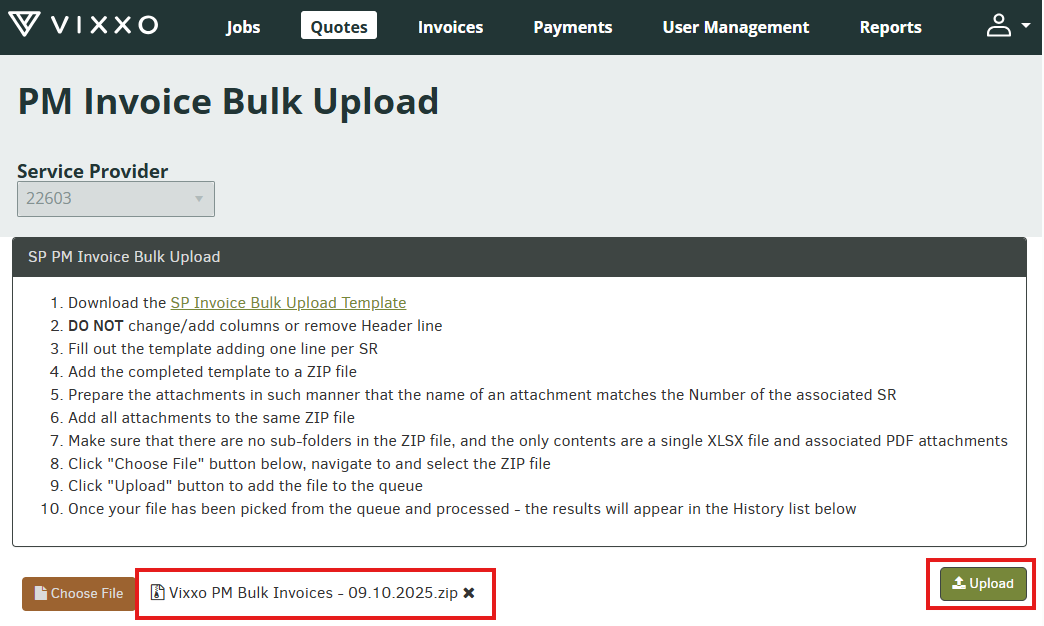
- Your file name appears next to the Choose File button. Click Upload on the right side of the page.
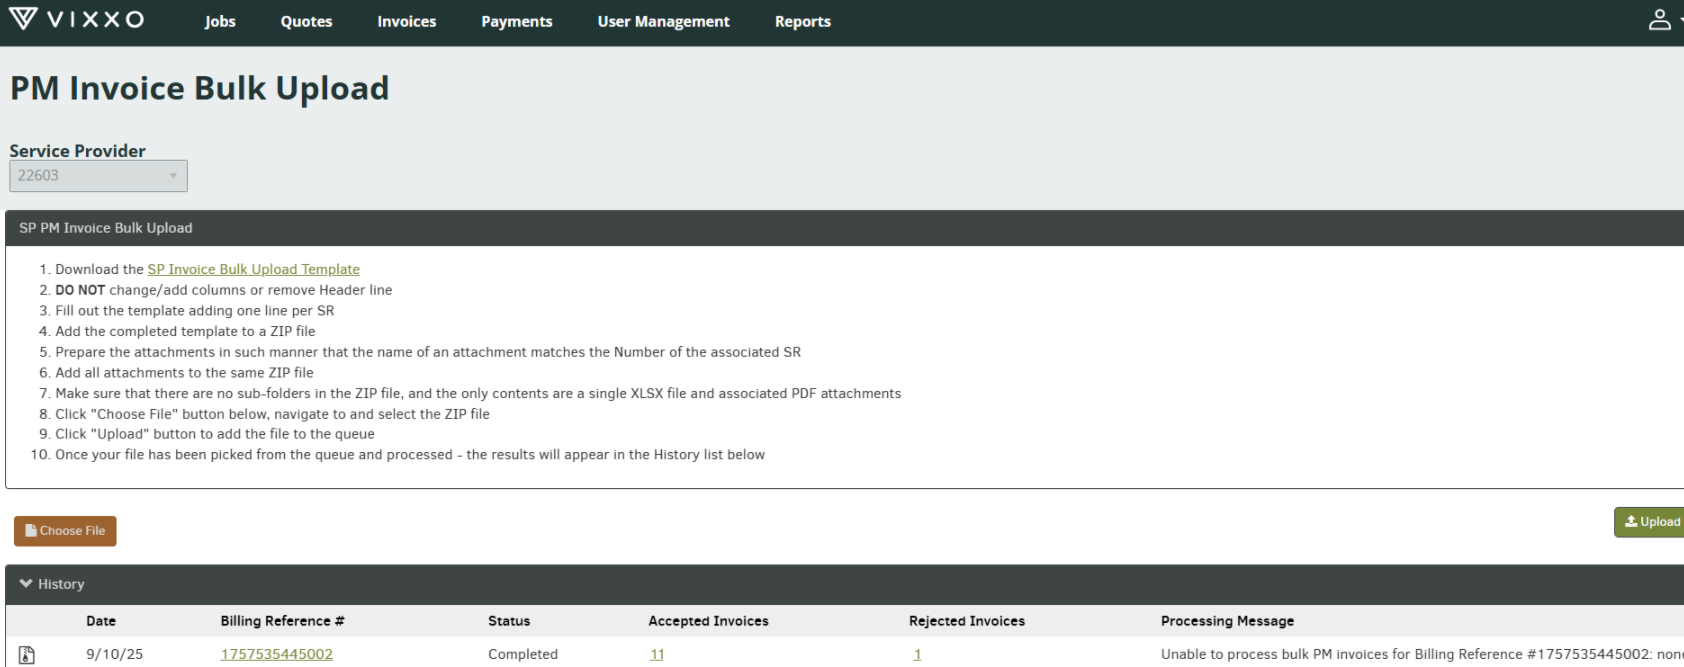
- Allow a few minutes for processing. Click the arrow by History to review status and see accepted vs. rejected counts.
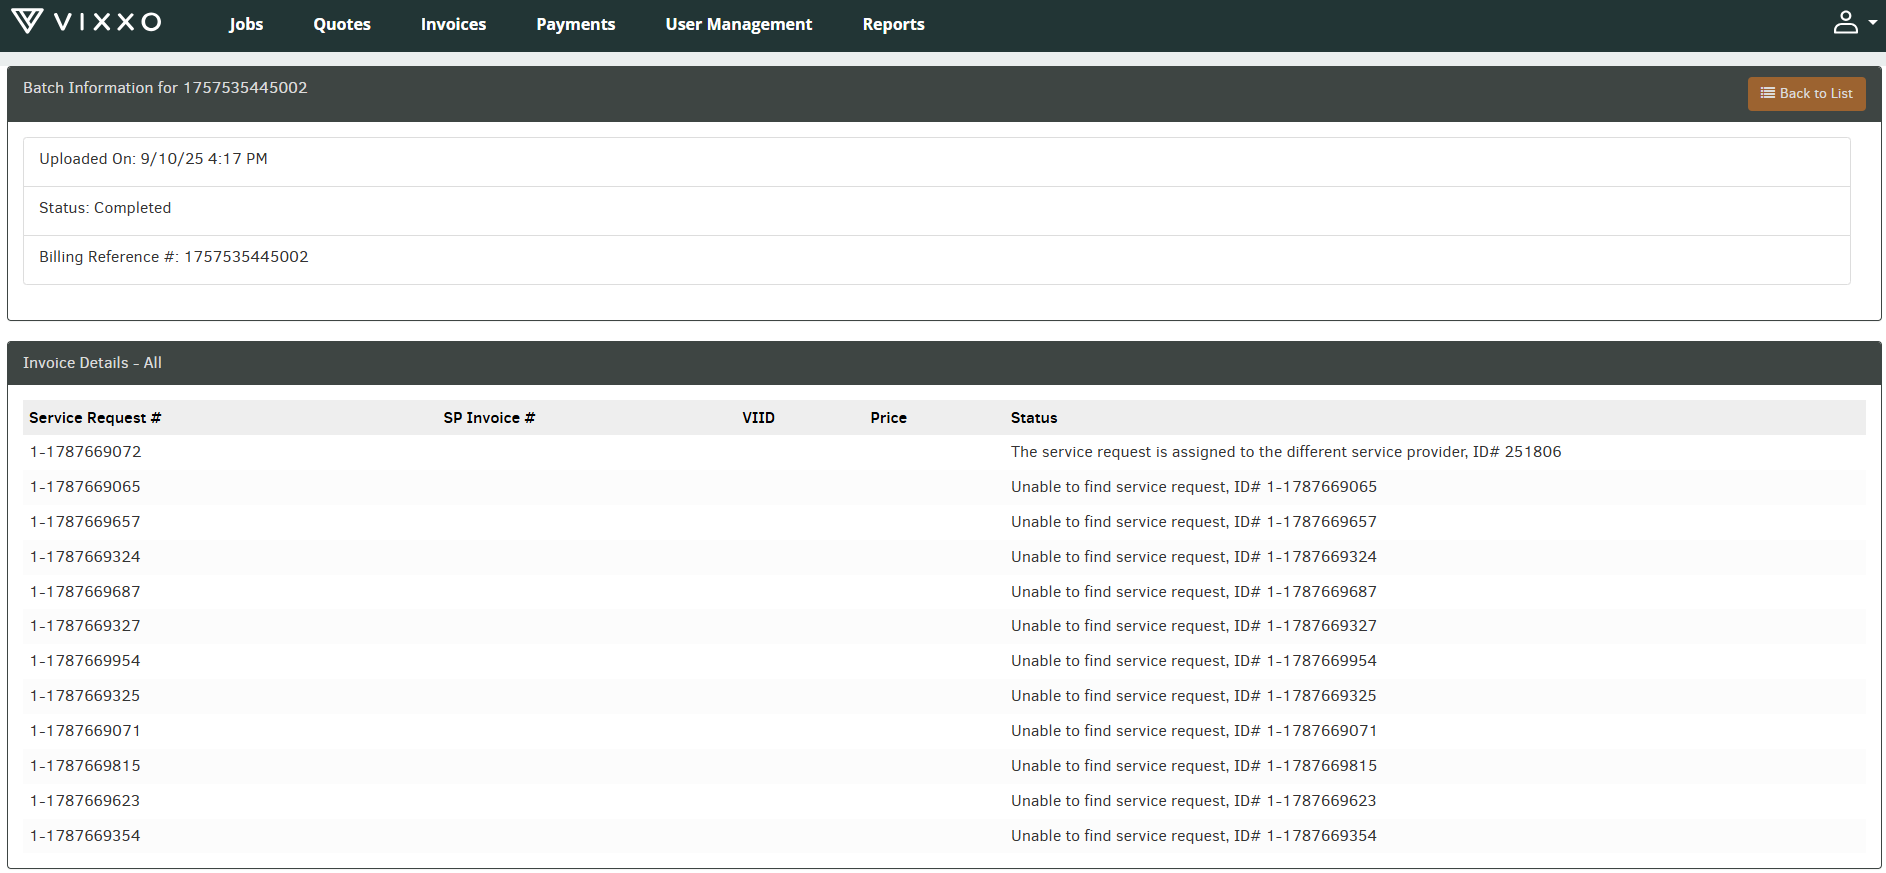
- Click the underlined Billing Reference # to review individual invoice status. If rejections occur, the reason appears under Status — review the note, correct, and resubmit, or contact Vixxo for assistance.
Quick Reference — PM Bulk Upload Checklist
| Step | What to verify |
|---|---|
| Eligibility | PM service requests only — use standard invoice process for reactive work |
| Spreadsheet | One row per SR; example row overwritten with real data |
| Invoice PDFs | Each PDF renamed to match SR Number in spreadsheet |
| ZIP file | Spreadsheet + all invoice PDFs compressed; files closed before zipping |
| Upload | Choose File → select ZIP → Upload |
| Follow-up | Check History for accepted/rejected counts; review Billing Reference # for rejection reasons |
Related articles:
- Creating an Invoice in VixxoLink
- Payment Delays
- Service Provider FAQs
- Step by Step - Work Order Process
Was this article helpful?
That’s Great!
Thank you for your feedback
Sorry! We couldn't be helpful
Thank you for your feedback
Feedback sent
We appreciate your effort and will try to fix the article